
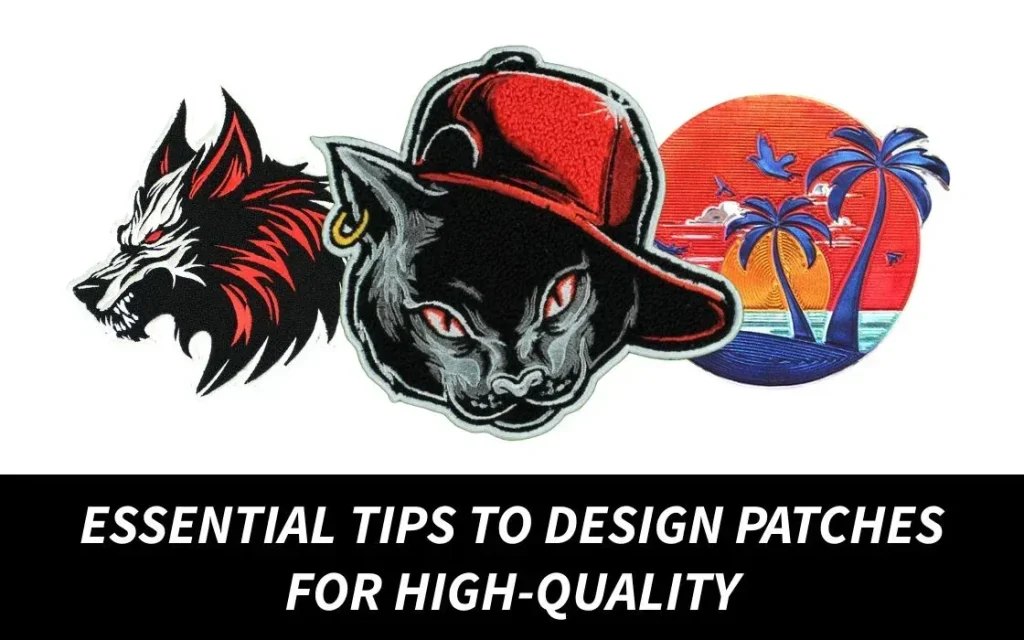
Patch Design Essentials reveals how to craft patches that look great, wear well, and tell a story. Whether decorating jackets, bags, hats, or uniforms, understanding materials for patches helps you balance durability with appeal. This guide highlights how color palettes for patches and patch shapes combine to communicate a message clearly within embroidery patch design. Choosing appropriate backing options and edge finishing ensures longevity through washes and daily wear. By integrating these elements, you’ll create patches that are both visually striking and practically durable.
Beyond the headline concept, the patch-making fundamentals focus on selecting fabrics, color schemes, and iconic silhouettes. Think of garment insignia as badges of identity, where the choice of materials for patches, color contrasts, and silhouette shape drive recognition. This approach translates into practical production decisions for embroidery, weaving, or printing, and it emphasizes durability and legibility at a distance. Whether you call them emblems, badges, or patches, the same principles guide how backing options, edge finishes, and size influence wear and wash performance.
Patch Design Essentials: Materials for Patches That Endure
Materials for patches form the foundation of look, durability, and care. The material you choose sets texture, weight, and how a patch wears over time. Twill, felt, denim, canvas, and leather each offer a distinct aesthetic and level of resilience, influencing how embroidery or weaving sits on the surface. When you select materials for patches, consider not just the initial appearance but how they perform during washing, abrasion, and daily wear. Durable fabrics help color and detail stay sharp, while selecting the right backing and edge finishing can prevent fraying and distortion at the borders. By prioritizing durability in materials, you create patches that feel premium and stand up to long-term use without sacrificing legibility or impact.
Backing, threads, and edge finishing are integral to longevity. Patch backing options like iron-on, sew-on, and Velcro each bring a different balance of convenience and security, so the choice should align with garment care and expected wear. Merrowed edges provide a durable, traditional finish, while laser-cut edges deliver a modern look but require careful stitch density to avoid fraying. Stabilizers underpin embroidery and help maintain shape on lighter fabrics or stretch materials. When you pair robust materials with robust backing and precise edge finishing, you achieve patches that resist peeling, curling, and color loss across frequent washes.
Color Palettes for Patches: Building Contrast and Readability
Color palettes for patches should maximize legibility and brand coherence. Start with a base color that aligns with the garment’s family, then add one or two accent colors and a neutral for outlines. Test swatches on actual fabric under different lighting to verify how hues translate beyond the screen. High-contrast combinations—dark text on a light background or light text on a dark fabric—improve readability on hats, jackets, or bags, while analogous palettes can feel cohesive and refined.
Colorfastness testing matters: before large runs, check how colors hold up to washing and exposure. For vibrant tones, consider using polyester threads with colorfast dyes and selecting fabrics with minimal dye transfer. In embroidery patch design, opacity and shading affect perceived color; plan shading to avoid muddy tones and ensure clear edge definition even on textured fabrics.
Patch Shapes that Communicate: Choosing Silhouettes with Impact
Patch shapes influence recognition and brand messaging. Recognizable silhouettes—circles, shields, stars, and rectangles—read quickly and reproduce reliably, while custom shapes can reinforce identity but demand tighter edge finishing to stay legible at smaller sizes. When you design patch shapes, test how the silhouette looks from a distance and up close to confirm it communicates your message instantly.
Border options and size decisions matter. A consistent border helps the patch sit against various backgrounds; merrowed borders are robust, while laser-cut edges offer a modern aesthetic. For small patches, a thinner border preserves lightness and avoids overpowering the artwork. Negative space inside the shape can emphasize letters or symbols and improve readability.
Embroidery Patch Design: Techniques, Threads, and Texture
Embroidery patch design relies on thread choice and stitch density. Polyester threads offer colorfastness and durability, while rayon threads provide a soft sheen and vibrant color at the cost of slightly reduced wash tolerance. Cotton threads can achieve a rustic or vintage effect but may require gentler washing. Thread selection influences color vibrancy, edge definition, and stitch texture, so plan the embroidery patch design with the fabric’s surface in mind.
Backing stability and edge finishing complement the embroidery. Stabilizers prevent distortion on lighter fabrics or stretch materials, and merrowed edges or satin borders define the patch’s perimeter for a durable, polished look. Considering backing options in tandem with materials ensures the patch remains flat, resists curling, and preserves detail after laundering.
Patch Backing Options: Iron-On, Sew-On, Velcro and Versatility
Patch backing options determine how patches are applied and how long they last. Iron-on backs are convenient for quick customization but rely on heat activation and may require reattachment over time. Sew-on patches deliver the strongest hold for frequent washing and tough wear, making them a reliable choice for uniforms or active gear. Velcro-backed patches enable easy removal and interchangeability, ideal for teams, clubs, or seasonal branding.
Backing selection should align with garment care and material behavior. On denim or canvas, sew-on patches tend to hold up best, while lightweight knits may benefit from iron-on with reinforced stitching at the edges. Consider care instructions and washing frequency when choosing backing options to maintain patch integrity and legibility while supporting the overall design.
From Concept to Patch: Practical Workflow for Patch Design Essentials
From concept to patch, a practical workflow keeps the project aligned with production realities. Start by defining the patch’s purpose and the garment it will adorn, which informs material selection, color strategy, and shape. Then choose materials first, build a color strategy with clear contrast, decide on shape and layout, and prepare vector outlines for scalable embroidery or weaving.
Prototype, test, and finalize before production. Create proofs on the actual fabric, run wash tests to verify colorfastness and texture, and lock in production specs—stitch density, backing, and edge finishing. This disciplined approach, grounded in Patch Design Essentials, speeds decision-making, reduces risk, and yields patches that perform consistently across fabrics and contexts.
Frequently Asked Questions
What is Patch Design Essentials and how does it guide selecting materials for patches?
Patch Design Essentials is a framework that centers on choosing materials for patches and balancing color palettes for patches and patch shapes to ensure patches look great and wear well. It guides you to evaluate fabrics, threads, and patch backing options—such as twill, denim, polyester threads, and iron-on or sew-on backings—so the final patch endures washing and daily use.
How do color palettes for patches influence design outcomes in Patch Design Essentials?
Color palettes for patches are guided by color theory, contrast, testing, and accessibility. In Patch Design Essentials, start with a base fabric color, add accent colors, and test colorfastness on actual fabric under varied lighting to ensure legibility and visual punch.
Why are patch shapes important in Patch Design Essentials?
Patch shapes determine recognition and message delivery. In Patch Design Essentials, choosing a recognizable silhouette (circle, shield, star) with appropriate edge finishing and managing negative space helps ensure the patch communicates instantly, even at small sizes.
In embroidery patch design, what considerations affect durability?
In embroidery patch design, stitch density, thread choice, backing, stabilizers and edge finishing determine resilience to washing and wear. Merrowed borders offer durability, while laser-cut edges require careful stitch density to prevent fraying.
What patch backing options are recommended and how do they affect wear?
Patch backing options such as iron-on, sew-on, and Velcro backings each suit different use cases. Iron-ons are convenient but require proper heat; sew-on patches are most secure for frequent washing; Velcro allows interchangeable patches.
How can I apply Patch Design Essentials from concept to production on a new patch project?
Apply Patch Design Essentials with this workflow: define purpose and garment, select materials first, build a color strategy with color palettes for patches, decide on shape and layout, create vector proofs, test on the actual fabric, and finalize production specs.
| Pillar | Key Points |
|---|---|
| Materials |
|
| Colors |
|
| Shapes |
|
| Practical considerations |
|
| Production options and workflow |
|
| Design workflow checklist |
|
Summary
Patch Design Essentials provides a practical framework for crafting patches that endure, express personality, and read clearly across fabrics. By focusing on materials, color strategy, and shape management, designers can create patches that are durable, visually striking, and ready for diverse wear contexts. The harmonized approach helps speed decision-making, reduce production risk, and deliver patches that stand out in any collection.