
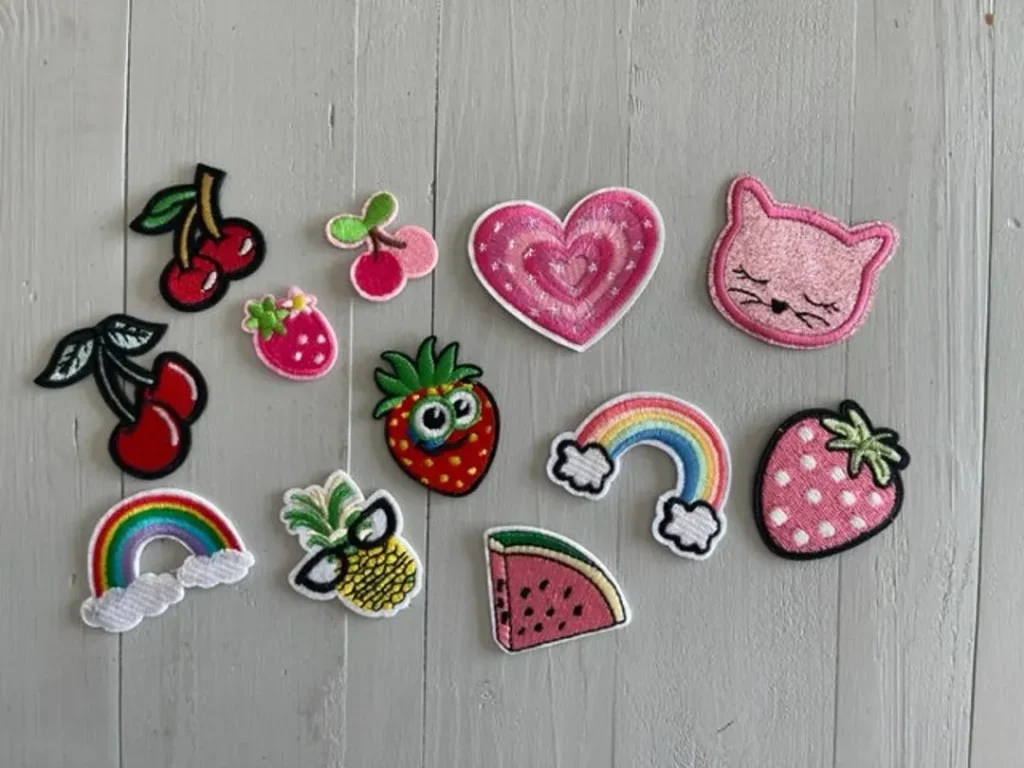
Iron-on embroidered patches offer a quick and creative way to personalize clothing, bags, and jackets. If you’re wondering how to apply iron-on patches, this beginner-friendly guide explains the steps from patch selection to heat timing. For added clarity, an iron-on patch tutorial within this guide covers alignment tips, surface prep, and aftercare. Choosing the best fabrics for iron-on patches matters, with natural fibers like cotton and denim delivering stronger bonds, while this guide also touches on washing clothes with patches. If you ever need to remove or move a patch, including removing iron-on patches, the guide explains safe methods to peel, re-seat, or reinforce edges.
Think of these heat-activated fabric patches as decorative appliques that fuse with your wardrobe through gentle heat and a secure adhesive. These adhesive-backed embellishments come in countless shapes and colors, letting you tailor jackets, bags, and denim with minimal sewing. From a material science perspective, the shift to instant decoration relies on a sturdy bond between natural or blended fabrics and a compatible backing. By treating these patches as quick, removable embellishments, you can experiment with versatile styling without committing to permanent stitching.
1) Iron-On Embroidered Patches: A Quick Way to Personalize Clothing
Iron-on embroidered patches offer a fast, beginner-friendly way to customize clothing, backpacks, and bags without sewing skills. They add texture, color, and personality to everyday fabrics, turning a plain item into a statement piece. By using iron-on embroidered patches, you can cover small blemishes, celebrate hobbies, or simply refresh your wardrobe with a durable decorative touch.
This guide will walk you through where to start, from choosing patches to proper care after application. If you’re exploring how to apply iron-on patches, you’ll find practical steps, tips, and checklists that help you achieve a professional finish that lasts through daily wear and washing.
2) Selecting Designs and Materials for Maximum Impact
Start with a clear idea of the look you want—bold graphics, subtle motifs, or a mixed collage. Consider patch size, color harmony, and how the design will sit on the fabric. When possible, choose patches with a heat-activated backing compatible with your garment’s material to ensure a strong bond.
Think about fabric choices as well. The best fabrics for iron-on patches typically include denim, cotton, canvas, and twill. For delicate knits or synthetics, you may need to adjust heat or press time or opt for sewing the patch in place for extra security.
3) Prep Like a Pro: Garment Readiness, Layout, and Protection
Before you apply patches, prepare the garment by smoothing wrinkles and, if possible, turning the item inside out to better control adhesion. Layout patches with a ruler or template to keep them straight and evenly spaced, which makes a noticeable difference in the final look.
Secure patches temporarily with pins or fabric tape, then place a barrier such as a pressing cloth over the patch. This protects embroidery threads and prevents shiny marks on the fabric, helping you achieve a clean, professional appearance.
4) The Heat Bond: Achieving a Durable, Clean Finish
Apply heat with a steady, controlled press. Use a medium-to-high temperature appropriate for cotton or linen, and avoid moving the iron side to side to keep edges from shifting. The goal is a firm bond without scorching the patch or fabric.
After pressing, check the edges and re-press if needed. Allow the patch to cool completely before testing adhesion. For extra security, you can reinforce the edges with a small amount of stitching, especially in high-movement areas like elbows or knees.
5) Fabric Compatibility Deep Dive: Understanding Best Surfaces for Patches
Natural fibers such as cotton, denim, canvas, and twill generally bond well with iron-on patches, giving you a stable surface for a lasting attachment. If you’re working with synthetic fabrics, test a small scrap first to observe how the adhesive behaves and adjust heat and time accordingly.
When in doubt, perform a quick test patch on a similar weave to your garment. This practice helps you avoid surprises during the final application and ensures the patch adheres reliably without damaging delicate fabrics.
6) Care, Removal, and Longevity: Washing, Repositioning, and Aftercare
Care and washing are essential to keep patches looking fresh. Turn garments inside out before washing, use cold or warm water on gentle cycles, and avoid harsh detergents that could degrade the adhesive or embroidery. Air-drying is ideal, and if you use a dryer, opt for a low heat setting with the garment inside-out.
If you need to remove or reposition patches, apply heat again to soften the adhesive and gently peel from the edges with a cloth barrier. Residues can be wiped away, and you can reapply patches using the same heat-and-press method or choose to sew around the edges for extra security. This approach aligns with general guidance on removing iron-on patches and reapplying them as needed, a common part of how-to content surrounding iron-on patches.
Frequently Asked Questions
What are iron-on embroidered patches and why choose them?
Iron-on embroidered patches are decorative patches with a heat-activated adhesive backing that bonds to fabric when heat is applied. They offer a quick, beginner-friendly way to customize clothing, jackets, and bags, with embroidery that adds texture and detail. For extra durability, you can reinforce the edges with a light stitch after pressing.
How to apply iron-on patches correctly (an iron-on patch tutorial)?
To apply iron-on patches, position the patch on the garment and protect the area with a pressing cloth. Set your iron to a suitable cotton/linen heat and press firmly for 15–30 seconds without moving the iron. Check that the edges are secured; if needed, re-press for another 10–15 seconds and allow the patch to cool fully.
Which fabrics are best for iron-on patches?
Best fabrics for iron-on patches are woven materials like cotton, denim, canvas, and twill, which provide stable bonding surfaces. If you’re using delicate synthetics or knits, test a scrap first or consider alternative attachment methods for extra security.
How do I remove or reposition iron-on patches safely?
To remove or reposition iron-on patches, apply heat again to soften the adhesive and protect the fabric with a barrier, then gently peel from the edge. If residue remains, wipe with a warm cloth or use a fabric-safe adhesive remover following the product instructions. You can reattach or reposition the patch by pressing again or sewing around the edges for durability.
What should I know about washing clothes with patches?
Washing clothes with patches should be done with care: turn the garment inside out, use cold or warm water on a gentle cycle, and avoid harsh detergents. Air-dry when possible; if you must use a dryer, choose low heat and keep the garment inside-out to protect the patches. After washing, re-press if edges loosen.
What are common mistakes when applying iron-on patches and how can I avoid them?
Common mistakes when applying iron-on patches include too-low heat, using steam, not protecting the patch, and rushing the cooling period. Ensure the iron is hot enough, press for the full recommended time, and use a barrier between the patch and fabric. For high-movement areas or delicate fabrics, add a light sewing stitch around the edge for extra durability.
| Aspect | Key Idea | Notes / Tips |
|---|---|---|
| What they are. | Heat-activated adhesive patches pressed onto fabric; embroidery adds texture and color. | Fast, beginner-friendly; no sewing required; heat activates the patch. |
| Benefits & Uses. | Personalize clothing, jackets, backpacks; cover blemishes; add color/texture. | Great for quick updates and hobby celebrations; durable finish. |
| Materials & Tools. | Patches with heat-activated backing; compatible fabrics. | Iron & ironing board; pressing cloth; pins/tape; optional needle/thread for reinforcement. |
| Fabric Compatibility. | Best on woven fabrics (cotton, denim, canvas, twill). | Test on scrap, check synthetic compatibility; delicate knits may need care or other attachment methods. |
| Step-by-Step Overview. | Prepare garment; position; protect with barrier; apply heat; cool; optional stitching; care. | Follow care tips to maintain adhesion and appearance. |
| Care & Longevity. | Turn inside-out; cold/warm gentle wash; avoid harsh detergents; line-dry; low heat dryer. | Re-press with barrier if edges loosen. |
| Removal & Repositioning. | Heat again to soften adhesive; peel edges with barrier; clean residue; reapply or sew for security. | Reseal with heat and/or stitching as needed. |
| Troubleshooting. | Curling/peeling due to insufficient heat or time; use longer press or stitch for durability. | Avoid steam; protect patch; ensure cooling. |
Summary
iron-on embroidered patches offer a quick, creative way to personalize clothing, jackets, backpacks, and bags, delivering a durable, wash-safe finish with minimal sewing. By selecting patches with heat-activated adhesive and testing on scraps, crafters can confidently attach patches to cotton, denim, canvas, and twill. Follow steps like preparing the garment, protecting both patch and fabric, applying steady heat, and allowing to cool for a lasting bond. Care tips such as turning garments inside out, using low-heat drying, and avoiding harsh detergents help maintain the appearance of iron-on patches. Overall, mastering iron-on embroidered patches opens countless design possibilities, from repairing small flaws to showcasing hobbies, while staying accessible to beginners.