
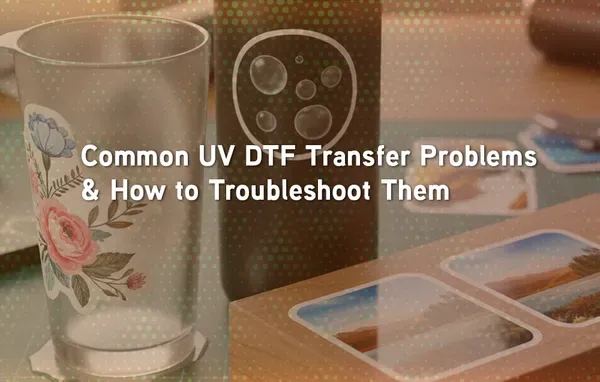
UV DTF transfer troubleshooting is essential for achieving vibrant, durable prints on a wide range of garments and hard surfaces. In this guide, you’ll learn about common DTF transfer issues, how UV curing problems in DTF can alter color, and practical fixes you can implement in your shop. We also cover DTF printing troubleshooting tips to improve adhesion and avoid misalignment, with DTF transfer adhesion tips woven into actionable steps. By identifying symptoms and adjusting curing, substrate prep, and press parameters, you can boost color accuracy and durability. Whether you’re starting out or refining a production line, this structured approach helps reduce waste and deliver consistent results.
Viewed through the lens of search intent, the topic centers on improving reliability of UV-curable film transfers for fabrics and hard surfaces. Related concepts include resin-jet transfer, UV-ink-on-film processes, and color consistency in heat-set transfers. Discussion areas touch on substrate compatibility, adhesion performance, curing uniformity, and pre-press workflows that prevent gaps and curling. In practical terms, the goal is to help printers achieve repeatable results by aligning equipment settings, material choices, and process steps.
UV DTF transfer troubleshooting: a structured diagnostic approach
A structured approach to UV DTF transfer troubleshooting helps technicians diagnose issues faster and reduce trial-and-error iterations. By framing problems as symptoms rather than inevitable defects, you can map symptoms like misalignment, color drift, or surface defects to specific root causes in the workflow—from substrate preparation to curing. This aligns with broader DT F printing troubleshooting practices and underscores the value of a repeatable process. Keeping a log of observed issues and corresponding adjustments creates a library you can reference for future runs, improving both speed and accuracy across jobs.
In practice, start with a simple, repeatable diagnostic plan: verify substrate flatness, confirm alignment marks, check cure distance, and run a baseline test print. This approach addresses common DTF transfer issues by isolating variables one at a time. Integrating a quick alignment check, color swatches, and a controlled curing test helps confirm whether symptoms originate from misregistration, curing irregularities, or adhesion problems, enabling targeted fixes rather than broad guesswork.
Mastering misalignment and registration in UV DTF transfers
Registration errors are among the most visible symptoms in UV DTF transfers and often stem from bed calibration drift, substrate loading inconsistencies, or thermal movement during curing. Misalignment can cause skewed designs, mismatched borders, or text that doesn’t sit true to the garment. Addressing these alignment quirks requires a disciplined approach to substrate handling, calibration routines, and curing parameters, all of which play a role in the wider context of DTF printing troubleshooting.
Fixes should start with hardware and process checks: recalibrate the transfer bed, use a dedicated alignment jig, and ensure the substrate lies flat without warping. A light pre-press can help stabilize fabrics, while adjusting cure distance and exposure settings minimizes substrate distortion. Run a dedicated alignment test on representative materials and document results to build reliable production profiles that reduce future misalignment occurrences.
Achieving consistent color: color management and troubleshooting tips
Color consistency is a common pain point in UV DTF transfers, with issues like fading, oversaturation, or color drift caused by substrate variability, ink or powder quality, and curing irregularities. Color performance is influenced by pre-press conditions and the stability of the color management workflow, making ICC profiling and printer calibration essential components of DT F printing troubleshooting. By addressing color at multiple steps—pre-press, ink deposition, and cure—you can minimize perceptual differences between test swatches and real garments.
Practical steps include calibrating color profiles tailored to your printer, resin, and substrate, and validating with color bars and grayscale ramps. Ensure powder adhesion is uniform so colors remain vibrant after fusion, and fine-tune curing parameters to avoid under- or over-cured results that dull or over-saturate hues. Maintaining consistent garment colors and textures during color-critical work helps preserve intended tones, while a controlled testing regimen reduces drift across batches.
White ink opacity and underbase optimization
White ink opacity is critical for achieving crisp images on dark or colored substrates. Symptoms such as weak opacity, chalky whites, or transparent areas typically indicate issues with the white underbase and subsequent color layering. In the UV DTF workflow, a dense, uniform white layer is the foundation for color accuracy, so underbase strategy, pass count, and alignment with the top colors are essential considerations in DT F transfer troubleshooting.
Fixes include validating white ink settings to produce a dense, uniform layer before applying color, and ensuring the white layer is fully fused with the powder. If necessary, increase white pass count or adjust ink-to-veneer ratios, and recheck pre-press and curing steps to maximize adhesion. For challenging fabrics, pre-treatments can improve white performance, while routine print-head maintenance helps ensure consistent white deposition across runs.
Adhesion, substrate compatibility, and powder performance
Adhesion problems often reveal substrate compatibility gaps or powder application issues. Peeling, cracking, or flaking after washing can arise when the chosen substrate isn’t within the recommended range or when adhesive powders are not properly distributed. Understanding substrate variability and its interaction with curing and heat is central to UV DTF transfer troubleshooting and is a frequent focus in DT F transfer adhesion tips.
To mitigate adhesion problems, confirm substrate compatibility, optimize pressing parameters (temperature, time, and pressure), and ensure even powder distribution. Allow a controlled cooldown after pressing to strengthen the bond and avoid micro-cracks. Pairing properly chosen powders with consistent pre-press and cure routines reduces edge lifting and enhances durability across fabrics and surfaces.
Curing quality and finish management: avoiding under-curing, over-curing, and gloss issues
Curing behavior directly affects durability and gloss, with under-cured transfers feeling soft and vulnerable to wear and over-cured prints appearing dull or embrittled. Managing curing distance and exposure for each substrate is a core element of UV DTF transfer troubleshooting, and monitoring lamp age helps maintain consistent output. Addressing curing irregularities is essential to prevent erratic surface finish and color inconsistency across production runs.
Techniques to improve finish consistency include verifying uniform exposure with diffusers or multiple lamps, replacing aging curing lamps, and using protective overlaminates when appropriate. A controlled cure protocol, combined with real-time checks on gloss uniformity, minimizes hotspots and ensures a stable final appearance. Regular maintenance and a validation routine with test swatches help catch UV curing problems in DTF before they impact large batches.
Frequently Asked Questions
During UV DTF transfer troubleshooting, what are the most common DTF transfer issues that cause misalignment, and how can I fix them?
Common misalignment causes in UV DTF transfer troubleshooting include bed calibration drift, imperfect substrate loading, and curing-induced movement. Fixes: recalibrate the transfer bed and verify alignment marks; ensure the garment or transfer sheet lies flat with a light pre-press; review cure distance and exposure and retest with a simple color block; run an alignment test on the same substrate and document results for future reference.
In UV DTF transfer troubleshooting, how can I address color fading, oversaturation, or color drift in DTF printing troubleshooting?
Color issues often come from substrate variability, ink/powder quality, and curing irregularities. Fixes: calibrate color profiles with an ICC profile tailored to your printer and substrate; verify powder adhesion and fusion; optimize cure time and lamp intensity to avoid under- or over-curing; use consistent garment colors/textures for color-critical work and test on representative materials.
Within UV DTF transfer troubleshooting, how do I fix white ink opacity problems to maintain dense, opaque whites?
White ink opacity problems can appear as weak opacity or chalky whites. Fixes: ensure dense white underbase printing and adjust white pass count or ink/powder ratios; ensure the white layer fully fuses before adding color; pre-treat fabrics when required to improve adhesion; inspect print head health and nozzle performance.
What are effective DTF transfer adhesion tips in UV DTF transfer troubleshooting to improve substrate compatibility and adhesion?
DTF transfer adhesion tips include confirming substrate compatibility with your workflow, optimizing pressing parameters (temperature, time, and pressure), using appropriate adhesive powders with even distribution, and allowing a cooldown period after pressing to reach full bond strength.
Which steps in UV DTF transfer troubleshooting address UV curing problems in DTF, including under-curing and over-curing?
Key steps to address UV curing problems in DTF during UV DTF transfer troubleshooting are to optimize UV lamp distance and exposure duration per substrate, inspect lamp age and output, ensure uniform exposure across the transfer area, and consider diffusers or multiple lamps for even curing; a protective overlaminate can help maintain finish in some cases.
How can I implement process improvements and validation steps as part of UV DTF transfer troubleshooting to prevent recurring issues?
Adopt a standard operating procedure (SOP) and a simple troubleshooting decision tree (start with print quality, then misalignment, then curing, then adhesion). Maintain a library of test swatches for each substrate, document settings for every substrate, and schedule regular curing/printer maintenance. Train operators and consider periodic workflow audits with a UV DTF printing consultant to identify optimization opportunities.
| Topic | Symptoms / Problems | Causes | Fixes / Actions |
|---|---|---|---|
| Misalignment and registration issues | Skewed designs; borders not lining up; skewed text | Bed calibration drift; imperfect substrate loading; thermal expansion during curing | Recalibrate bed; verify alignment marks; ensure substrate flat; light pre-press; review cure distance/exposure; adjust UV lamp distance; run alignment test; document results |
| Color issues: fading, oversaturation, or color drift | Color shifts between test swatches and real garments | Substrate variability; ink/powder quality; curing irregularities; pre-press variations | Calibrate color profiles (ICC); verify powder adhesion/fusion; check curing parameters; use consistent garment colors/textures; baseline tests |
| White ink and opacity problems | Weak opacity; chalky whites; transparency where opaque | Insufficient white underbase; white layer not fully fused; fabrics needing pre-treatment; print head/nozzle issues | Ensure proper white underbase; increase white pass count or adjust ink/varnish ratios; check powder synchronization; pre-treat fabrics; inspect print heads |
| Adhesion problems and substrate compatibility | Peeling, cracking, or flaking after washing | Substrate compatibility; improper pressing parameters; powder adhesion; cooldown issues | Confirm substrate compatibility; optimize pressing parameters; use appropriate adhesive powders; allow cooldown period |
| Curing and finish issues | Under-curing, over-curing, gloss anomalies | UV lamp distance/exposure; lamp age/output; uneven exposure | Optimize lamp distance and exposure for each substrate; inspect lamp age; ensure uniform exposure; use overlaminate as needed |
| Edge lifting, curl, and substrate distortion | Edges lift or curl after pressing | Moisture; improper pre-press; heat distribution issues | Pre-press to remove moisture; adjust edge pressure; align/secure with clamps during curing; test on sample swatches |
| Ghosting, pinholes, and surface defects | Ghosting; pinholes; surface defects | Dust, static, powder inconsistencies, contamination on transfer bed | Clean transfer bed; antistatic measures; humidity control; refresh powder equipment; run control print |
| Process improvements and validation steps | Guidance for proactive troubleshooting (not a symptom) | Not applicable/ongoing processes | Create SOP; decision tree; test swatch library; document substrate settings; maintain curing/printer; regular maintenance |
| Advanced tips and best practices | Best practices for ongoing accuracy and efficiency | Calibration, clean workspace, spare parts, operator education, workflow audits | Use calibration garments; maintain clean workspace; keep spare parts; educate operators; consider a workflow audit |
Summary
HTML table presents key topics, symptoms, causes, and fixes for UV DTF transfer troubleshooting taken from the base content. Each row summarizes a major area of concern and practical corrective actions to implement in a UV DTF workflow.