
Embroidered borders offer an easy, eye-catching way to elevate sewing projects without requiring complicated designs, making DIY finishes feel refined and accessible. From delicate blouses to cozy table runners, a neatly stitched edge can transform ordinary fabric into something personal and unique. By choosing embroidery borders in the right weight and thread, you can achieve a professional finish that lasts. These techniques range from subtle running stitches to decorative stitches that echo the garment’s style while remaining practical for everyday wear. Whether you’re revamping a hem, cuffs, or a side edge, borders provide a polished frame that complements the fabric and reflects your personal taste.
Beyond the exact phrase embroidered borders, designers often speak in terms like stitched edging, border embroidery, or decorative edge finishes that achieve a similar refined look. This approach focuses on how edge treatments enhance fabric weight, drape, and durability, whether applied to hems, cuffs, or seam lines. Use a mix of decorative stitches and practical hemming ideas to craft a tailored silhouette that remains comfortable and durable. Think of these techniques as a language of edges that communicates style through texture, stitch density, and color without overpowering the fabric.
Frequently Asked Questions
What are embroidered borders and how can they elevate hems and edges?
Embroidered borders are decorative stitching that runs along a fabric edge, giving hems and edges a polished finish. They can reinforce the edge, reduce fraying, and create a professional look using decorative stitches in the color and thread of your choice.
How do I choose the right embroidered borders for my fabric and project?
Choose based on fabric weight, border width, and stitch style. For lightweight fabrics, opt for delicate borders in a single color; for heavier fabrics, a bolder border with satin or longer chain stitches can stand out. Consider fabric type, thread choice, color harmony, and edging techniques to achieve the best balance.
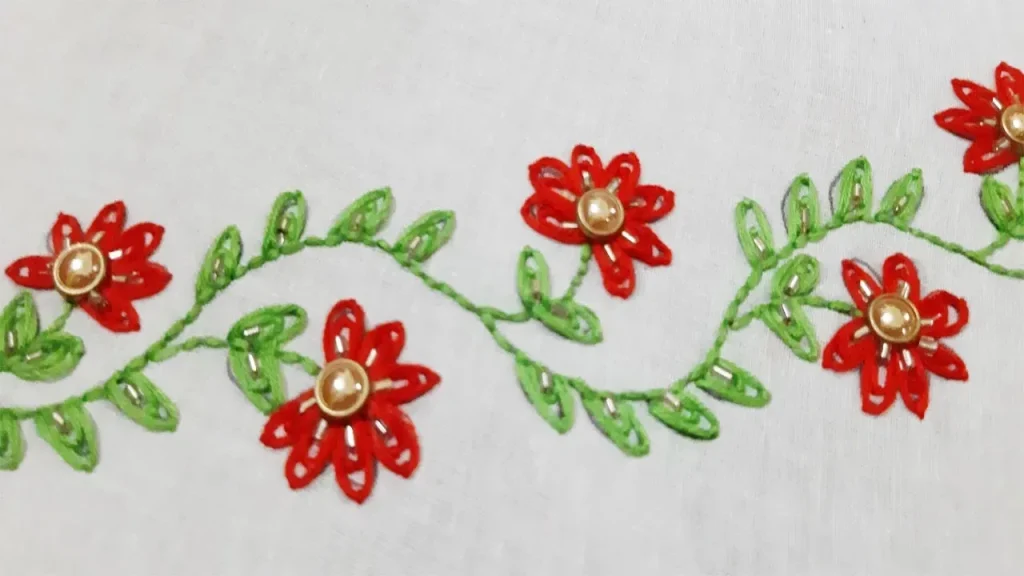
What are the common edging techniques for embroidered borders that work on hems?
Popular edging techniques include satin stitch borders for a glossy edge, backstitch or stem stitch for crisp lines, chain stitches for texture, and picot or fringe details for a playful finish. These options allow you to tailor the border to the project’s style and fabric.
How can I apply embroidered borders to hems and edges in a project?
Prepare the edge with a clean hem or binding, mark the border placement, apply a suitable stabilizer, and embroider lengthwise. Finish by trimming threads and pressing from the wrong side to set the stitches and maintain a neat edge.
Which fabrics, threads, and stabilizers work best for embroidery borders, and what hemming ideas help finish edges?
Use tear-away stabilizers for woven fabrics or appropriate stabilizers for knits, cotton embroidery floss for a matte look, or rayon/polyester for subtle sheen. Metallic threads require careful tension. These choices inform hemming ideas that ensure a neat, durable edge without puckering.
How should I care for embroidered borders to keep them looking fresh over time?
Care for embroidered borders with gentle washing, avoid high heat, and iron on a low setting from the wrong side using a pressing cloth. Air-dry when possible, especially for metallic threads, to preserve color and texture.
| Aspect | Key Points | Notes / Examples |
|---|---|---|
| What are embroidered borders and hems? | Decorative stitching along edges; can reinforce edge, reduce fraying; used on hems, cuffs, and edges; can be hand-stitched or machine-made. | Signatures of cohesion and durability; adds personality to textiles. |
| Choosing the right border | Match border to fabric weight, project purpose, and color story; weight and border width matter. | Consider fabric type, thread choice, color harmony, border width, and stitch style. |
| Techniques for borders | Multiple approaches exist; can be done by hand or machine. | Examples: satin stitch, backstitch, stem stitch, chain stitch, running stitch, picot/fringe. |
| Practical tips | Stabilize fabric, hoop correctly, test on scraps, finish with proper pressing and trimming. | Helps ensure tension, density, and a professional finish. |
| Applying to hems and edges | Prepare edge, mark border placement, stabilize area, embroider lengthwise, finish and press. | Creates even spacing and a polished edge around garments or textiles. |
| Project ideas | Apply to blouses, table runners, quilts, cushions, and drapery edges. | Inspires practice and versatile application across projects. |
| Care and maintenance | Gentle care preserves color and texture; avoid harsh chemicals; line-dry; handle metallic threads with care. | Supports longevity and keeps borders looking vibrant. |
Summary
Embroidered borders offer a versatile, accessible path to elevate sewing projects across garments and home textiles. This approach adds a polished edge, guiding the eye with decorative stitching along hems, edges, and cuffs while reinforcing fabric where needed. Choosing the right border means considering fabric weight, color harmony, and stitch style to achieve a balanced look. Practical techniques—from satin and chain stitches to backstitch and running stitch—allow crafters to tailor texture and sheen. With careful preparation, testing, and finishing, embroidered borders deliver professional results without large-scale alterations, making them a reliable, repeatable technique for personalizing clothing, tableware, quilts, and décor. By building a small library of border ideas and practicing on scraps, you’ll gain confidence to apply embroidered borders confidently to hems and edges in future projects.