
DTF transfers have emerged as a versatile solution for bringing vibrant graphics to textiles. Understanding the DTF transfer process helps explain why designers and printers favor this approach for bold, repeatable results. It relies on a careful balance of DTF film vs ink choices and a well-managed DTF curing process to maintain color brightness and adhesion. From artwork preparation to the final heat press, DTF printing workflows offer flexibility across fabrics and production scales. If you’re weighing DTG vs DTF differences, this method can deliver high-fidelity graphics with a soft hand on a range of garments.
In other terms, direct-to-film graphics—often described as film-based transfers or garment decals—provide a fast route to decorating apparel. The concept centers on printing a design onto a film, applying an adhesive, and then transferring the image to fabric with heat, a method that many brands rely on for on-demand decorating. This semantically rich topic shares ground with phrases like fabric-on-film printing, heat-press decoration, and digital transfer techniques. By adopting these alternative terms, you can maintain an SEO-friendly, approachable description that helps readers grasp how such systems compare to other methods.
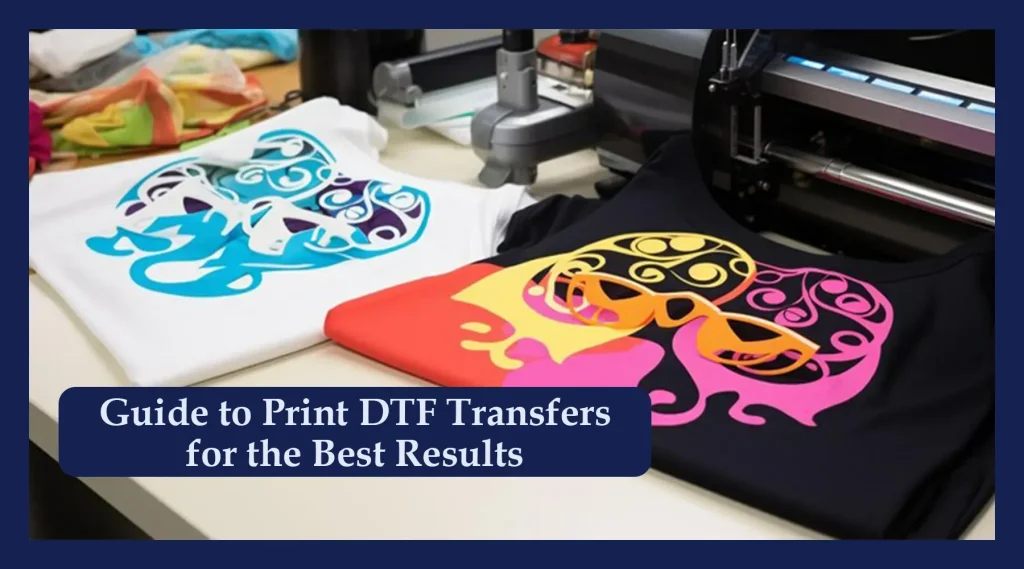
Understanding the DTF Transfer Process: From Design to Garment
DTF transfers enable vibrant, full-color graphics on textiles by following a defined transfer process that carries ink from film to fabric. Understanding the DTF transfer process helps printers optimize color accuracy, durability, and hand feel, whether you’re working with cotton, blends, or select synthetics. This overview also highlights how the film, ink, and curing steps come together to create a professional result on a variety of garments.
Key stages include careful artwork preparation, CMYK printing on a PET film (often with a white underbase for opacity on dark fabrics), coating with adhesive powder, curing the film, and heat transferring the design to the garment. By mastering these steps, you can reduce common pitfalls and achieve predictable results with DTF transfers that stand up to washing and wear.
DTF Film vs Ink: Material Choices That Shape Color and Feel
DTF Film vs Ink is a central consideration in achieving bright colors, smooth gradients, and strong adhesion. The PET film acts as the carrier for both the ink and the adhesive, and the choice of ink formulation—especially the white underbase—significantly influences opacity on dark fabrics and the perceived vibrancy of the final print. Selecting the right combination affects both color performance and the softness of the finished hand feel.
In practice, higher-quality film with uniform thickness reduces gathering and improves return-to-roll stability, while ink chemistry determines how well colors layer and cure. A well-balanced film and ink pairing supports consistent results across batches, minimizes color shifts, and contributes to reliable DTF printing outcomes from run to run.
DTF Curing Process: Stabilizing Adhesive and Preparing for Transfer
DTF curing process control is essential to stabilize the adhesive powder before transfer. Proper curing temperatures and times ensure the powder adheres to the printed areas without clumping or scorching the ink, preserving color fidelity and edge definition. Mis-timed curing can lead to tackiness, poor transfer, or reduced wash durability, making precise parameter control critical.
Calibrating the curing step to your specific adhesive, film, and fabric type helps maintain flat, wrinkle-free transfers. As you adjust film settings, keep an eye on how curing interacts with subsequent heat press parameters, because consistent curing contributes to repeatable results across different fabrics and production runs.
DTF Printing Techniques: Achieving Bright, Consistent Reproductions
DTF printing uses a CMYK ink set, often augmented with white ink, to deliver full-color designs directly onto PET film. The printing step is influenced by RIP settings, color management, and file preparation to ensure that color tones translate accurately from screen to film and then to fabric. Mastery of DTF printing includes ensuring clean white underbase areas where needed and maintaining sharp details in gradients and fine lines.
Attention to workflow details—such as color profiling, printer calibration, and precise layer sequencing—helps minimize color drift during production. By optimizing the DTF transfer process in printing, you can achieve consistent results that resemble traditional screen-printed art while preserving the soft hand of the garment after heat pressing.
DTG vs DTF Differences: When to Choose Direct to Garment or Direct to Film
DTG vs DTF differences are a common consideration when planning a project. DTF printing generally offers lower setup costs for small runs, easier management of inks, and compatibility with a broader range of fabrics, though some users note a slightly firmer hand due to the adhesive layer. DTG printing, by contrast, often excels in ultra-high-resolution single shirts on cotton and blends but may require pretreatment and more maintenance for optimal results.
Evaluating the choice between DTF transfers and DTG involves assessing production volume, garment type, wash durability, color vibrancy on dark fabrics, and workflow complexity. For many catalogs, DTF transfers provide a robust, repeatable method across a variety of designs, while DTG can shine for high-detail pieces on light fabrics with premium hand feels.
Practical Tips to Maximize DTF Transfers Quality and Longevity
Practical tips for success with DTF transfers start with controlled tests when adopting new materials or settings. Keeping a test log for fabrics, inks, and films helps refine RIP profiles and color management, reducing guesswork and speeding production. A reliable workflow and routine maintenance—such as cleaning printer heads and film paths—also support consistent color and adhesion across runs.
Maintaining consistent heat and pressure, selecting appropriate adhesive formulations, and educating customers on proper garment care further extend the life of DTF transfers. Plan for garment variety by maintaining separate profiles for cotton, blends, and synthetics, and routinely verify white ink opacity and film compatibility to preserve brightness and durability across your catalog.
Frequently Asked Questions
What is the DTF transfer process and how does it work?
DTF transfers start with artwork prep and color management, followed by printing onto a transparent PET film using CMYK inks (often with white ink for opacity on dark fabrics). After printing, an adhesive powder is applied and the film is lightly cured, then the design is transferred to the garment with heat and pressure, and the film is peeled away while warm. The result is a vibrant, full-color transfer that bonds through the adhesive layer.
DTF film vs ink: how do these choices affect color, opacity, and hand feel?
DTF film is the carrier that holds the ink and adhesive, while the ink formulation determines color vibrancy and opacity, especially with a white underbase on dark fabrics. A high-quality PET film surface and consistent thickness help ensure smooth transfers and less gathering. In practice, choosing the right film vs ink combination can impact brightness, softness, and how the color sits on fabric.
What is the DTF curing process and why is it important?
The DTF curing process lightly cures the adhesive powder to set it in place before the final transfer. Proper curing stabilizes the powder and reduces powder clumping, which helps achieve a clean transfer and better wash durability. Curing parameters should be tuned to the adhesive and film you use and may vary with fabric type.
DTF printing vs DTG differences: which is better for your project?
DTF printing generally offers lower setup costs for small runs, easier ink management, and broader fabric compatibility, with strong color and a soft hand due to the adhesive layer. DTG printing often yields ultra-high-resolution images on cotton and blends but may require pretreatment and higher ongoing maintenance. Consider production volume, fabric type, wash durability, and workflow when choosing between DTF printing and DTG differences.
What are common issues in the DTF transfer process and how can I troubleshoot them?
Common issues include color drift or faded areas, peeling or poor adhesion, ink smearing, and white underbase visibility on dark fabrics. Troubleshooting tips include reviewing color management and RIP settings, ensuring proper curing of the adhesive, verifying transfer temperatures and dwell times, and checking film handling and powder adhesion before transfer.
What practical tips help improve durability and wash-fastness of DTF transfers during DTF printing?
Run controlled tests when adopting new materials, maintain a reliable RIP workflow with accurate color profiles, and keep heat and pressure consistent across runs. Use compatible inks and film, tailor profiles to different fabrics, and provide clear wash-care guidance to customers to protect durability and color vibrancy.
| Key Point | Highlights / Summary |
|---|---|
| What are DTF transfers? | Printed onto PET film using CMYK (often with white underbase), coated with adhesive powder, cured, then transferred to fabric with heat and pressure; a full-color transfer that works on cotton, blends, and some synthetics; enables complex artwork with great details. |
| DTF transfer process (overview) | Artwork preparation and color management; printing onto PET film; applying adhesive powder; curing the film; transferring to the garment with heat/pressure; finishing and optional post-press cure for durability. |
| DTF film vs ink | Film is the carrier that holds ink and adhesive; ink formulation, white underbase, and film quality affect vibrancy and opacity; high-quality PET film yields consistent results; decisions influence final look. |
| DTF curing process | Curing stabilizes the powder and prepares the film for transfer; over-curing can damage ink or film, under-curing leaves loose powder; calibrate to adhesive/film and fabric; ensures flat, durable transfers. |
| DTF printing vs DTG differences | DTF offers lower setup for small runs, easier ink management, and broad fabric compatibility with a soft hand; DTG provides very high-resolution graphics on cotton/blends but may require pretreatment and higher maintenance; choose based on volume, fabrics, wash durability, and workflow. |
| Quality, durability, and reliability: tips for success | Fabric prep and substrate compatibility; ink/film compatibility; color management and proofing; calibrated press settings and timing; post-transfer care; maintenance of printer heads and film path. |
| Troubleshooting common issues | Color drift or fading; peeling or poor adhesion; ink smearing or ghosting; white underbase visibility on dark fabrics; address via color management, curing, adhesion checks, and film handling. |
| Practical tips for success | Run controlled tests for new materials; invest in a solid RIP workflow and color profiles; maintain consistent heat and pressure; test flexible adhesives for softer hand; keep separate profiles for different fabrics. |
| Applications and market potential | DTF transfers suit tees, hoodies, bags, and home decor; ideal for small brands and on-demand services; ongoing improvements in inks and films expand possibilities for complex, gradient-rich designs across fabrics. |
Summary
DTF transfers offer a compelling combination of color fidelity, versatility, and ease of use. By mastering the DTF transfer process, understanding the role of DTF film vs ink, and refining the DTF curing process, you can achieve durable, vibrant designs across a wide range of fabrics. When comparing DTF transfers with other methods like DTG, consider project scale, fabric types, and desired hand feel to choose the best approach. With careful preparation, the right equipment, and consistent workflow practices, DTF transfers can elevate garment customization and meet customer expectations for professional, long-lasting prints.