
DIY 3D embroidered hats let you wear art on your head and express personal style. The puff or raised embroidery adds depth to logos, monograms, and playful designs. In this guide, you’ll learn a practical approach from concept to finished product. Whether you’re decorating a beanie, a dad hat, or a snapback, the steps are designed to deliver crisp lines, vibrant colors, and a durable finish. This introduction sets the stage for the techniques covered in the rest of the article.
Beyond the name, the craft relies on dimensional stitching, foam underlays, and careful planning to create puff embroidery on hats with real dimension. Think of it as dimensional hat embellishment, where raised stitches add texture and depth to simple shapes. These ideas map well to terms like 3D embroidery hat design and other related concepts that help search engines connect ideas. If you’re seeking a step-by-step hat embroidery workflow, you’ll follow the same planning, stabilization, and finishing principles. As you explore, you’ll find embroidered hat ideas you can adapt to different styles and brands.
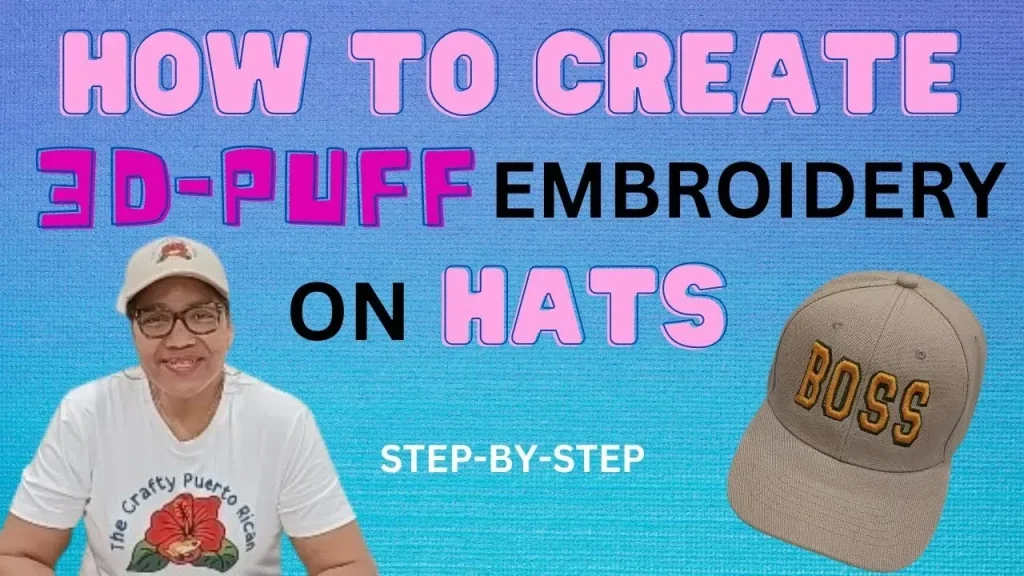
DIY 3D Embroidered Hats: From Concept to Wearable Art
DIY 3D embroidered hats invite you to turn logos, monograms, and playful motifs into wearable art with depth and texture. This approach uses puff or raised embroidery to push stitches outward, creating a dimensional effect that elevates even simple shapes. By planning the concept, choosing the right hat, and mapping out stitch paths, you can achieve crisp lines and vibrant color without sacrificing durability. The result is a personalized accessory that showcases your design sense while remaining comfortable for daily wear.
As you embark on a DIY embroidered hats project, you’ll appreciate how the puff embroidery on hats can transform ordinary headwear into statement pieces. This guide emphasizes practical steps, from selecting materials to finishing touches, so you can enjoy a professional-looking outcome. Whether you’re decorating a beanie, dad hat, or snapback, the 3D technique adds texture and depth that standard embroidery simply can’t match.
Design Planning for 3D Embroidery Hats: 3D Embroidery Hat Design and Digitizing
Successful 3D embroidery starts with thoughtful design planning. In particular, focusing on the 3D embroidery hat design helps you anticipate how foam or felt underlays will push stitches outward for the puff effect. Consider clean outlines, bold silhouettes, and simple color blocks that render well when raised. Clear planning also aids when you translate a concept into a stitch-ready file, ensuring balance between motif size and hat surface.
Digitizing for 3D effects requires careful workflow. Build a stable foundation first, then add the foam or underlay to create height before applying top stitches. If you’re new to step-by-step hat embroidery, start with two or three colors and test your puff height on scrap fabric. This preparation minimizes surprises when you stitch the final piece on the hat.
Choosing Hats and Materials for Puff Embroidery on Hats
Choosing the right hat is crucial for a successful puff-filled design. Look for smooth front panels and sufficient height to accommodate the 3D motif. Cotton twill and canvas caps are reliable choices that hold shape and accept threads cleanly. A higher-profile crown provides more room for multi-color designs, while avoiding textured surfaces helps keep the raised stitches crisp.
The materials list supports a durable result. Foam or felt underlays give the puff dimension, and stabilizers—tear-away or cut-away—anchor stitches securely. Pair these with quality embroidery threads and the appropriate hooped setup to maintain stability throughout stitching. Proper material selection helps prevent distortion and ensures a long-lasting finish.
Step-by-Step Hat Embroidery: From Stabilizers to Finishing
A well-executed step-by-step hat embroidery process starts with reliable stabilization and precise hooping. Begin by positioning the design at the center front, then lay down a stable base layer that anchors the puff. This foundation determines how evenly the puff height presents across the motif and helps avoid fabric movement during stitching.
Next comes the core puff creation: apply the foam or felt underlay, then stitch the 3D top layers and final contour. Finishing edges with a crisp outline and heat-setting the area with care ensures the puff holds its shape after washing. A thorough final inspection for loose threads, edge clarity, and foam alignment helps you catch issues before they become noticeable on the hat.
Creative Ideas and Embroidered Hat Ideas for 3D Effects
Incorporating 3D effects opens up a world of embroidered hat ideas that feel fresh and premium. Monograms with bold 3D outlines, animal silhouettes with layered depth, and logo badges featuring puff banners can elevate a simple cap into a branded or personal piece. By exploring combinations of shapes and textures, you can craft designs that read clearly from a distance and reward close inspection with tactile detail.
Seasonal motifs, botanical elements, and mixed silhouettes offer even more ways to push embroidery beyond flat designs. Pairing a strong central motif with supporting 3D elements helps balance the composition across different hat colors and textures. This approach is especially effective for small collections or brand storytelling through embroidered hat ideas that stay visually cohesive.
Care, Maintenance, and Troubleshooting for DIY Embroidered Hats
After completing a DIY embroidered hat project, proper care extends the life of the puffed stitches and keeps colors vibrant. Avoid prolonged direct sun exposure and harsh washing that can flatten the puff. Gently spot-clean stained areas and air-dry to preserve height, shape, and thread integrity. A well-maintained hat continues to look good and perform well in daily wear.
If you encounter issues, refer to common troubleshooting steps for puff embroidery on hats. Warping, inconsistent puff height, edge gaps, or color bleed often stem from insufficient stabilizers, foam height variance, or tension problems. Adjust stabilizer use, confirm foam thickness uniformity, and re-test on scrap fabric before re-stitching the final hat. Following these tips keeps your DIY embroidered hat project progressing smoothly and professionally.
Frequently Asked Questions
What are DIY 3D embroidered hats and how does puff embroidery enhance the design?
DIY 3D embroidered hats use puff embroidery on hats to create raised, dimensional designs. The puff effect comes from foam or felt underlays in the 3D embroidery hat design, pushing stitches outward for depth. This approach works well for logos, monograms, and simple motifs, especially when you plan underlays and stabilization in advance.
Which hat styles work best for DIY 3D embroidered hats and why?
Choose hats with a smooth front panel, such as cotton twill or canvas, like a dad hat, beanie, or snapback. A higher-profile cap offers more room for tall 3D motifs in your 3D embroidery hat design, while shallow front panels limit puff height. Avoid hats with heavy textures that can distort raised stitches.
What is the step-by-step process for 3D embroidery on hats (step-by-step hat embroidery)?
Plan your design and placement, create a stable base layer, add the foam underlay for puff, stitch the top 3D elements, finish with a clean edge, and set the work with a gentle heat press. Hoop the hat securely and test on scrap material to verify puff height and stitch density before stitching the final piece.
What materials and underlays are essential for puff embroidery on hats?
Key materials include a suitable hat, a hat hoop, tear-away or cut-away stabilizers, foam or felt underlay for puff, embroidery threads, scissors, and layout tools. Use foam colors that contrast with the hat to maximize depth, and keep stabilizers generous to prevent distortion.
How can I troubleshoot common issues in 3D embroidery on hats and maintain puff height?
Common issues include warping, inconsistent puff height, and gaps at the edges. Increase stabilizer, ensure secure hooping, and verify foam thickness and underlay consistency. Use a defined outline to contain the puff, test tension, and pre-test colorfastness to avoid bleed.
What are some embroidered hat ideas and how should I plan a DIY embroidered hat project for best results?
Ideas include bold monograms with a 3D outline, animal silhouettes or botanical elements, logo badges with a puff banner, and seasonal motifs. For a smooth DIY embroidered hat project, start with a clear concept (embroidered hat ideas), plan color harmony across designs, digitize with a 3D puff underlay, test on scrap fabric, and then stitch on your final hat.
| Key Point | Summary |
|---|---|
| What 3D embroidery is | Uses foam or felt underlays to push stitches outward, creating a raised, dimensional look on hats. |
| 3D vs. flat embroidery | 3D puff stitches add depth and shadow; even simple shapes look premium. Can be machine-made or hand-stitched with careful layering. |
| Hat suitability | Choose hats with a smooth front panel and sufficient height (cotton twill or canvas). Consider crown depth and profile for larger motifs; avoid highly textured surfaces. |
| Design planning | Start with a motif, decide scale/placement, choose contrasting colors and underlays, and plan for 3D digitizing or hand-stitching approaches. |
| Materials & tools | Hat, embroidery machine with hat hoop, stabilizers, foam/felt underlay, threads, scissors, ruler, chalk or template. |
| Workflow overview | Prepare design → create foundation → add 3D layer → set stitch types/density → plan color order → test on scrap → hoop and stabilize → save file. |
| Assembly & stitching | Position/mask design, stitch base layer, add 3D foam, finish edges with outline, trim excess material, heat-set carefully, final inspection. |
| Finishing & care | Avoid over-washing; air dry to maintain puff; re-press gently if needed; plan color harmony for multi-design projects. |
| Troubleshooting | Warping or distortion, inconsistent puff, edge gaps, or color bleed—adjust stabilizer, foam height, stitch density, and tension; re-test on scrap. |
| Inspiration & ideas | Monograms with bold 3D outlines, animal or botanical silhouettes, logo badges with puff accents, seasonal motifs, or mixed silhouettes for complexity. |
| Maintenance | Protect from direct sun, store properly, and clean gently to preserve puff height and stitch integrity. |
Summary
“DIY 3D embroidered hats” offer a gateway to wearable art, allowing you to layer texture and color for distinctive headwear. By planning motifs, selecting materials, and following a clear design-to-assembly workflow, you can achieve professional-looking results that elevate your headwear beyond flat embroidery. Start with a solid concept, choose the right hat with a smooth front panel, and methodically build up the puff effect through a well-structured workflow. With practice, you’ll refine your 3D hat embroidery skills and build a library of designs that express your brand or personal style.