
Launching a Budget screen printing studio setup can seem intimidating at first, yet it is entirely possible to begin producing professional quality prints even when funds are limited and space is modest, provided you start with a clear plan, realistic goals, and a willingness to iterate as you learn. The core idea is to build a lean, scalable workflow that preserves color fidelity and repeatability while minimizing waste, so you can grow from a spare room into a dedicated workspace without making a heavy upfront investment in equipment you may outgrow quickly. Start with a practical map of where you coat screens, expose artwork, wash and reclaim, cure garments, and store supplies, then set a modest budget that prioritizes reliable tools, easy maintenance, and safety over novelty. A well designed layout that minimizes unnecessary movement, keeps inks and solvents separate, and clearly delineates prep, production, and finishing zones will pay dividends in consistency, speed, and long term morale as you scale. As you progress, focus on essential tools, dependable suppliers, and pragmatic DIY adjustments that improve efficiency without straining cash flow or complicating your workflow.
From a broader perspective, this enterprise can be viewed as a compact, cost aware printing workshop designed to turn creative ideas into tangible goods with disciplined space management. Treat it as a starter studio rather than a full scale operation, emphasizing practicality, repeatable processes, and careful investment only when demand warrants it. Plan in phases, reassess equipment needs after a few successful runs, and seek secondhand or refurbished components that offer dependable performance at a fraction of the cost. Maintain clear standard operating procedures, document ink mixes and drying times, and implement simple quality checks to build trust with customers and ensure consistent results. With patience and persistence, a small, well organized space can grow into a reliable income stream without compromising safety or quality.
Budget screen printing studio setup: Space, Budget, and Workflow
Begin by surveying your available space and setting a realistic budget for a Budget screen printing studio setup. Map out zones for coating screens, exposing, washing, curing, and storing inventory, and decide whether you will print occasionally or full time. This upfront planning helps you identify constraints such as power, ventilation, and surface area, and makes it easier to design a functional home screen printing studio.
Adopt a phased approach that starts with essentials and expands as revenue and demand grow. This keeps you focused on core capabilities and avoids overinvesting in equipment you do not yet need. By prioritizing workflow efficiency and safe use of space, you can build a productive budget oriented operation that scales with your business.
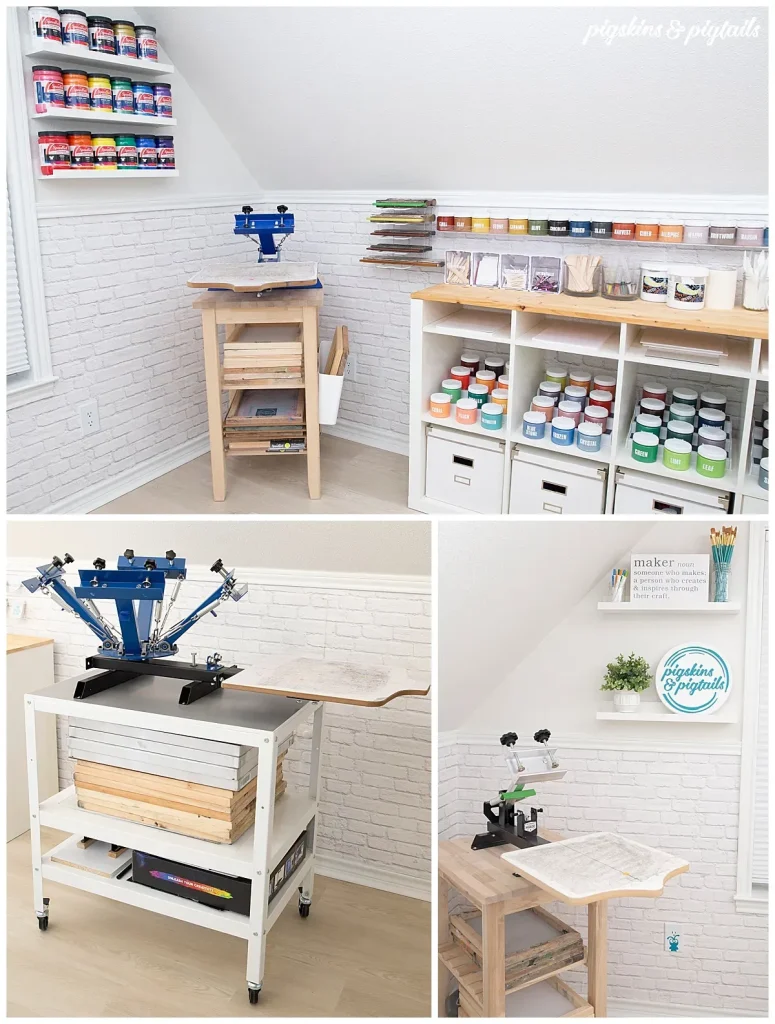
Affordable Equipment Essentials for a Budget Screen Printing Studio
The core of any budget setup is choosing affordable yet reliable equipment. Focus on key components such as screens and frames, inks, squeegees, exposure methods, and a basic curing setup. When you search for affordable screen printing equipment, prioritize consistency and repeatability over flashy features.
Consider starting with a small set of basic colors plus a white base, and explore second-hand frames, refurbished exposure units, and occasional outsourcing for exposure if needed. This approach keeps the Budget screen printing studio within reach while still delivering solid print quality and repeatable results for a home screen printing studio.
DIY Improvements for a DIY Screen Printing Setup in a Home Studio
Budget-friendly improvements can raise print quality without requiring a large investment. Embrace practical upgrades that fit a DIY screen printing setup, such as a simple wash station and a DIY exposure box that helps you test screens efficiently. These upgrades keep costs down while preserving control over the printing process.
Other effective DIY ideas include using heat for curing small runs, reclaiming screens for reuse, and repurposing common furniture to create a functional workflow. These adjustments support a true home screen printing studio approach and align with screen printing on a budget principles while maintaining consistent results.
Layout and Workflow for a Home Screen Printing Studio
A well-planned layout reduces fatigue and boosts throughput in a home screen printing studio. Consider a linear or U-shaped setup where prep, exposure, printing, curing, and storage zones are within easy reach. Position the exposure and coating stations near a sink to simplify cleanup and keep the workflow tight.
In a budget-minded environment, arrange the printing station so the press, ink supply, squeegees, and screens are accessible in a single work zone. A dedicated curing and storage area with good ventilation helps maintain print quality and safety, reinforcing efficient operations in a home screen printing studio and supporting consistent results even when you are screen printing on a budget.
Sourcing Smartly for a Budget Studio: Used and Repurposed Gear
Smart sourcing is a cornerstone of a budget friendly operation. Look for used or refurbished presses, older exposure units, and pre-owned screens in good condition. Community groups, local print shops upgrading equipment, and marketplace listings can yield substantial savings that keep your budget intact.
Build or repurpose where possible to stretch every dollar. Use existing PVC racks for drying, repurpose a sturdy table as your printing station, and maintain a simple, organized storage system. Focusing on durable items where it matters—like a reliable squeegee and stable ink formulations—helps your budget screen printing studio deliver solid, repeatable results.
Quality Control, Safety, and Scaling Your Studio Over Time
Quality control is essential for building trust with customers and ensuring consistent results. Implement a simple QC routine that checks alignment, repeatability, and color accuracy after every few runs. Keep a log of recipes, including colors, ink ratios, mesh counts, and squeegee durometer to reproduce results reliably, all while maintaining a budget oriented workflow.
Safety and scaling go hand in hand. Ensure proper ventilation, safe storage of inks and emulsions, and compliant waste disposal. As demand grows, scale gradually by adding screens or upgrading exposure and ink management, reinvesting profits to improve workflow without compromising the low-cost foundations of your Budget screen printing studio setup.
Frequently Asked Questions
What is a Budget screen printing studio setup and why is it a practical choice for beginners?
A Budget screen printing studio setup is a cost-conscious plan to start a screen printing operation by prioritizing essential gear, affordable options, and phased upgrades. It’s practical for beginners because you can start small in a home space, test demand, and reinvest profits as you grow—without a six-figure investment.
How can I create a home screen printing studio on a budget?
Begin with space assessment and a simple floor plan, then choose affordable gear (consider second-hand frames and a DIY exposure method). This home screen printing studio approach keeps capital low while enabling production for small runs and helps you learn the workflow fast.
Which affordable screen printing equipment should I prioritize in a budget screen printing studio setup?
Prioritize durable basics: aluminum screens, a small ink set (plastisol or water-based), a few squeegees and flood bars, a simple exposure method, and a drying/curing station. Look for used or refurbished items to stretch your budget while maintaining consistency.
What DIY screen printing setup ideas help save money without sacrificing quality?
Use a DIY exposure box, build a basic wash station, and employ heat for curing on small runs. Reclaim and reuse screens, and repurpose existing furniture or racks to maintain a clean, functional workspace without expensive upgrades.
How should I plan the layout and workflow for a budget screen printing studio to maximize efficiency?
Choose a linear or U-shaped layout with zones for prep/design, coating/exposure, printing, curing, and storage. Keep equipment within reach to minimize movement, and design the space to support a steady rhythm from idea to finished print.
What quality control practices are recommended for screen printing on a budget?
Implement a simple QC routine: check alignment and print repeatability, verify color accuracy after a few runs, and document recipes (colors, ink ratios, mesh counts, squeegee durometer) so you can reproduce results consistently while staying on a budget.
| Key Point | Summary |
|---|---|
| Space and Budget | Plan space with a clear floor plan: designate areas for coating, exposing, washing, curing, and storage; decide if you’ll operate intermittently or full-time and cap each category (screens, ink, squeegees, reclaiming supplies). Start with essentials and expand over time to avoid overinvesting. |
| Essential Equipment on a Budget | Core components include screens/frames, inks, squeegees and flood bars, a simple exposure setup, a drying/curing solution, and a washout area. Prioritize second-hand or affordable options and focus on consistency and repeatability. |
| Sourcing Affordable Equipment | Buy used or refurbished gear, explore trade/barter, and repurpose existing items (drying racks, tables). Focus on quality where it matters (durable squeegees, reliable ink) to maximize value. |
| Layout and Workflow for Efficiency | Adopt a linear or U-shaped setup with dedicated zones: prep/design, exposure/coating near a sink, printing station within reach, and separate curing/storage. Ensure good ventilation and safety throughout. |
| DIY Improvements that Save Money | Use a simple wash station, DIY exposure box, and heat-based curing where appropriate. Reuse and recycle by refurbishing screens and repurposing furniture to minimize new purchases. |
| Quality Control and Consistency on a Budget | Implement a basic QC routine: check alignment, repeatability, and color accuracy after sets of prints. Maintain a notebook of recipes (colors, ink ratios, mesh counts) for reproducibility. |
| Scaling Your Budget Studio Setup | As demand grows, add more screens and a larger press gradually. Upgrade exposure, ink management, and the workspace incrementally, ideally moving toward a dedicated, well-ventilated room. |
| Practical Home-Based Tips | Start small and test markets, price strategically, stay organized with storage systems, and comply with safety and disposal requirements to sustain operations long-term. |
Summary
Conclusion: Budget screen printing studio setup is a feasible path for entrepreneurs who plan carefully, start with essential gear, and steadily expand as demand grows. By focusing on an efficient layout, affordable equipment, and smart sourcing, you can launch a home screen printing studio that delivers quality prints without overspending. The journey from a modest, budget-conscious space to a productive print shop hinges on deliberate choices, testing methods, and reinvesting profits into equipment that enhances your workflow. With patience, persistence, and good planning, you can turn a small area into a thriving, scalable screen printing operation that remains cost-effective and reliable over time.