
This guide introduces 10 Essential Embroidered Stitches to help you build a solid embroidery foundation that can support everything from delicate linens to bold textile art, and it starts you with practical habits that make hand-stitching enjoyable rather than intimidating. Designed for beginner embroidery stitches, it weaves together core techniques such as running stitch and backstitch, with clear guidance on tension, stitch length, and fabric choice so you can practice confidently without frustration. You’ll also explore satin stitch for smooth fills and French knot accents that add texture without overpowering a design, along with practical demonstrations that translate to pillows, garments, or wall art. As you practice, these stitches blend into versatile combinations to outline shapes, shade areas, and decorate edges, while you build muscle memory and control. With clear demonstrations and bite-sized practice projects, you’ll gain confidence to choose the right stitch for your design and to finish threads neatly, making every project feel achievable.
Viewed through an alternative lens, these same concepts translate into starter-level needlework techniques and core stitch patterns that form the vocabulary of textile decorating. The approach foregrounds foundational hand-stitching skills—the practical motions, tension control, and steady rhythm—that unlock outlines, fills, and textured effects across fabrics. By thinking in terms of stitch families, motifs, and simple practice projects rather than rigid labels, you align with common search terms used by hobbyists exploring beginner embroidery crafts. This overview also touches on related topics such as embroidery hoops, color planning, and practice samplers, presenting a coherent path from basic motions to more expressive designs.
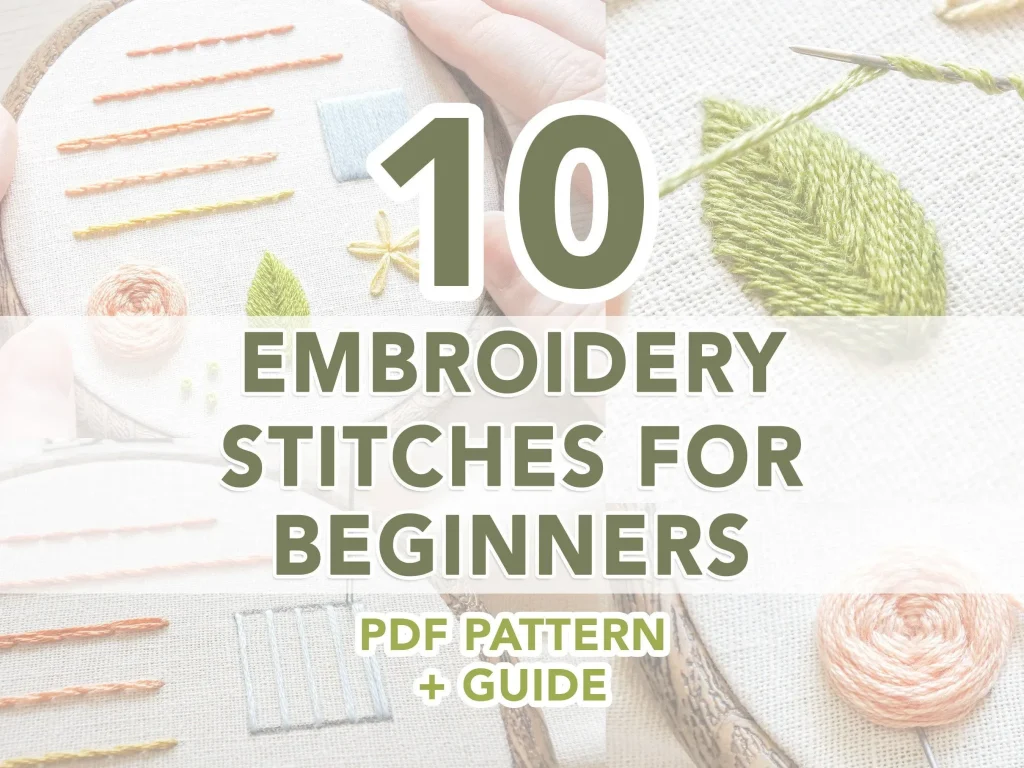
10 Essential Embroidered Stitches: A Beginner’s Roadmap to Mastery
Embroidery offers a language of stitches that opens up countless design possibilities for beginners. The “10 Essential Embroidered Stitches” form a core vocabulary every hobbyist should know, enabling you to outline, fill, texture, and decorate with confidence. By focusing on beginner embroidery stitches, you’ll build muscle memory, control, and consistency that translate across projects—from pillows to garments to heirloom pieces.
This roadmap shows how the stitches fit together to create cohesive designs: crisp outlines, smooth color fills, and delicate textures. You’ll see how foundational stitches like the running stitch and backstitch become the rails that support more complex work, while satin stitch and long-and-short stitch offer bold surfaces and subtle shading. With practice, these techniques empower you to turn simple sketches into polished embroidery with consistent tension and even stitches.
Running Stitch and Backstitch: The Building Blocks of Clean Outlines
The running stitch is the first step toward reliable hand embroidery, teaching you about spacing, cadence, and thread tension. It’s ideal for light outlines, guiding lines, and gentle shading, making it a staple in any beginner’s toolkit among beginner embroidery stitches. By practicing uniformity in length and rhythm, you’ll reduce puckering and create a steady foundation for more intricate designs.
Backstitch, the workhorse for precise borders and continuous lines, complements the running stitch beautifully. It produces a solid, unbroken line that’s perfect for lettering and defined silhouettes. When you practice, aim for tiny, even stitch lengths and stitches that butt up with each other, ensuring a seamless edge. Mastering backstitch alongside the running stitch helps you build reliable outlines you can rely on across projects.
Satin Stitch Essentials: Filling Shapes with Smooth Color
Satin stitch is your best friend for color-filled shapes, providing smooth, dense surfaces that resemble a satin finish. It’s especially effective for petals, leaves, letters, and any motif where bold color and a uniform surface are desired. For beginners, keeping stitches short and parallel, and avoiding gaps or crowding, is the key to achieving a flawless satin surface.
As you practice satin stitch, work in orderly rows and adjust tension to keep each stitch lying flat. If you’re rounding curves, stitch shorter lengths to maintain a smooth contour. The result is a clean, even field of color that supports both simple outlines and intricate shading, making satin stitch a versatile tool in your embroidery repertoire.
Texture and Detail: French Knot, Lazy Daisy, and Beyond
Texture adds life to embroidery, and the French knot is famous for its tiny, puffy detail. Use it to accent centers of flowers, eyes in animals, or little berries. With careful control of thread length and the wrap around the needle, French knots become a reliable textural element that catches the eye without overpowering the design.
Lazy Daisy (Detached Chain) is another charming texture stitch perfect for petals and floral accents. By creating small, detached loops, you can form a field of blooming shapes along stems or borders. Pair French knots with Lazy Daisy to craft lively, botanical motifs that feel natural and organic on fabric.
Edges that Move: Stem Stitch, Chain Stitch, and Split Stitch for Expressive Borders
Stem stitch follows a gentle diagonal flow that mimics natural lines, making it ideal for stems, curves, and delicate borders. Its slightly slanted line adds a soft, organic feel to your motifs, contrasting with the rigidity of straight stitches. Practicing stem stitch helps you develop smooth curves and consistent tension along longer lines.
Chain stitch brings a decorative, linked texture that can outline leaves and petals with added dimension. By controlling loop size and spacing, you can create a dynamic edge that reads as both outline and texture. Split stitch, meanwhile, offers a sturdier line with a subtle texture, splitting the thread as you go to build a tidy, tactile border or design element.
Practice Plans and Practical Tips for Mastering the 10 Essential Embroidered Stitches
A structured practice plan accelerates progress and reinforces muscle memory for all the essential stitches. Start with a week dedicated to running stitch, backstitch, and satin stitch, then layer in stem stitch, chain stitch, and Lazy Daisy for a floral sampler. This approach mirrors the progression described in beginner-friendly guides and keeps you steadily building confidence.
Tips for ongoing success include choosing a comfortable fabric and thread, using a hoop for stability, and focusing on even tension and consistent stitch length. Color planning in advance helps you create cohesive projects, while maintaining a practice sampler alongside project work ensures you’re continually reinforcing technique as you create.
Frequently Asked Questions
What are the 10 Essential Embroidered Stitches, and how should a beginner start building a toolkit of beginner embroidery stitches?
The 10 essential stitches cover outlines, fills, and texture: running stitch, backstitch, satin stitch, stem stitch, chain stitch, Lazy Daisy, French knot, Blanket stitch, Long and Short Stitch, and Split Stitch. For beginners, start with a simple sampler to practice consistency and tension, and assemble a basic toolkit (fabric, hoop, embroidery floss, appropriate needles) to support steady progress with beginner embroidery stitches.
How does satin stitch compare to backstitch for outlining and filling shapes in the 10 Essential Embroidered Stitches?
Satin stitch is ideal for filling shapes with a solid color and a smooth surface, while backstitch creates crisp, continuous outlines. Use satin stitch for filled areas and backstitch for clean edges or lettering to achieve a balanced, professional look within the 10 essential stitches.
What is the best way to practice running stitch, backstitch, and French knot within the 10 Essential Embroidered Stitches to achieve clean results?
Practice on small fabric swatches, keeping stitches uniform in length and tension. For running stitch and backstitch, focus on straight edges and gentle curves; for French knot, keep thread length short and wraps tight but not pulling too hard. A regular, repeatable routine builds confidence with these core stitches.
Which stitches from the 10 Essential Embroidered Stitches are best for petals and leaves, and how does Lazy Daisy fit into beginner embroidery stitches?
Lazy Daisy is perfect for petals, while stem stitch and chain stitch help define leaves and stems with natural movement. The combination of Lazy Daisy, stem stitch, and chain stitch provides beginner embroidery stitches that create floral motifs with texture and dimension.
How can Long and Short Stitch and Split Stitch be used for shading and outlines as part of the 10 Essential Embroidered Stitches?
Long and Short Stitch is used to blend colors and create gradients for shading, especially in petals and leaves, while Split Stitch offers a slightly textured outline that’s stronger than a simple backstitch. Together, they expand the tonal and textural range of the 10 essential stitches.
What are common mistakes to avoid when working with the 10 Essential Embroidered Stitches, and how can beginner embroidery stitches improve finish and durability?
Avoid pulling too tight, which causes puckering; keep stitches even in length and spacing; secure thread ends properly, and anchor tails by weaving them into nearby stitches. These habits, practiced with the 10 essential stitches, improve finish, durability, and overall embroidery quality.
| Stitch | What it does | When to use | Quick tip |
|---|---|---|---|
| Running Stitch | Creates a simple dashed line for outlines, light shading, and delicate details. | Outlines for text, subtle guidelines, or dotted texture. | Keep stitches uniform in length; maintain steady tension; secure ends. |
| Backstitch | Creates a solid continuous line for outlines, lettering, and defined silhouettes. | Outlines, borders, and precise shapes. | Maintain even stitch lengths; place stitches close together; use light tension to avoid puckering. |
| Satin Stitch | Fills shapes with smooth, solid color for bold, uniform surfaces. | Petals, leaves, letters, and decorative motifs. | Work in rows; keep stitches flat and parallel; avoid gaps or crowding. |
| Stem Stitch | Imitates the natural flow of a stem or line; graceful curves. | Stems, borders, and fine outlines. | Alternate directions; vary stitch length to change curvature. |
| Chain Stitch | Creates a linked chain-like line with texture. | Outlines and texture in motifs; leaves and petals. | Keep stitches tight for a neat line; space slightly for a looser look. |
| Lazy Daisy (Detached Chain) | Petal shapes for flowers and decorative floral accents. | Petals, leaves, and small floral motifs. | Vary chain length; anchor with straight stitches to stabilize the motif. |
| French Knot | Adds textured knots for centers and small details. | Flower centers, eyes, berries. | Wrap thread a few times; pull gently to form a knot; avoid over-tightening. |
| Blanket Stitch | Decorative edging and borders; finishes edges. | Edges, appliqué, buttonholes, and decorative borders. | Adjust stitch length; short for dense edges, long for looser edges. |
| Long and Short Stitch | Shading technique that creates gradients and tonal variation. | Shading petals, leaves, and blended areas. | Vary stitch lengths; space strategically to blend colors. |
| Split Stitch | Textured outlining and filling; stronger than backstitch. | Outlines needing body; textured floral designs. | Split each previous stitch; maintain even tension and balance on curves. |
| Practice plan and tips | Putting it all together: a structured plan to practice and combine stitches. | Weeks 1–4 progressions with a sampler approach. | Follow the weekly plan; practice consistency, tension, and integration of stitches. |
Summary
10 Essential Embroidered Stitches open a world of creative possibility for beginners and beyond. This collection covers foundational techniques that help you outline, fill, shade, and embellish fabric with confidence. By practicing the steps and following a focused plan, you’ll learn to control thread tension, maintain even stitch lengths, and build stitches into cohesive designs. Whether you’re decorating home textiles, garments, or art panels, these stitches form the backbone of versatile embroidery projects and gradually expand your repertoire as you gain fluency and joy in the process. Embrace patience, purposeful color planning, and deliberate practice, and you’ll transform ideas into polished embroidery projects.