
A strong custom screen printing design starts with a clear concept and a plan for how the artwork will translate through the screen printing process. A solid preparation stage emphasizes prepress for screen printing, setting up a smooth design to print workflow that reduces misregistrations. Understanding screen printing design steps helps manage color count, separations, and ink choices, ensuring print-ready artwork for apparel. Early decisions about color separation for screen printing and the base garment color guide how the final look will translate across fabrics. Documenting the concept, establishing color palettes, and validating proofs before production create a predictable, scalable path from concept to product.
A related way to frame this topic is to view it as tailored apparel graphics that move from concept to production through a careful preparation phase. Latent Semantic Indexing (LSI) principles emphasize a clear prepress sequence, file organization, and proofing as the bridge between artistry and manufacture. Rely on scalable vector artwork and bold silhouettes to simplify color separation for screen printing, ensuring clean results across many garment colors. Think of the workflow in terms of design intent, print readiness, and color planning, rather than a single final image. By collaborating with the printer and validating proofs early, you reinforce a robust path from idea to finished, wear-ready graphics.
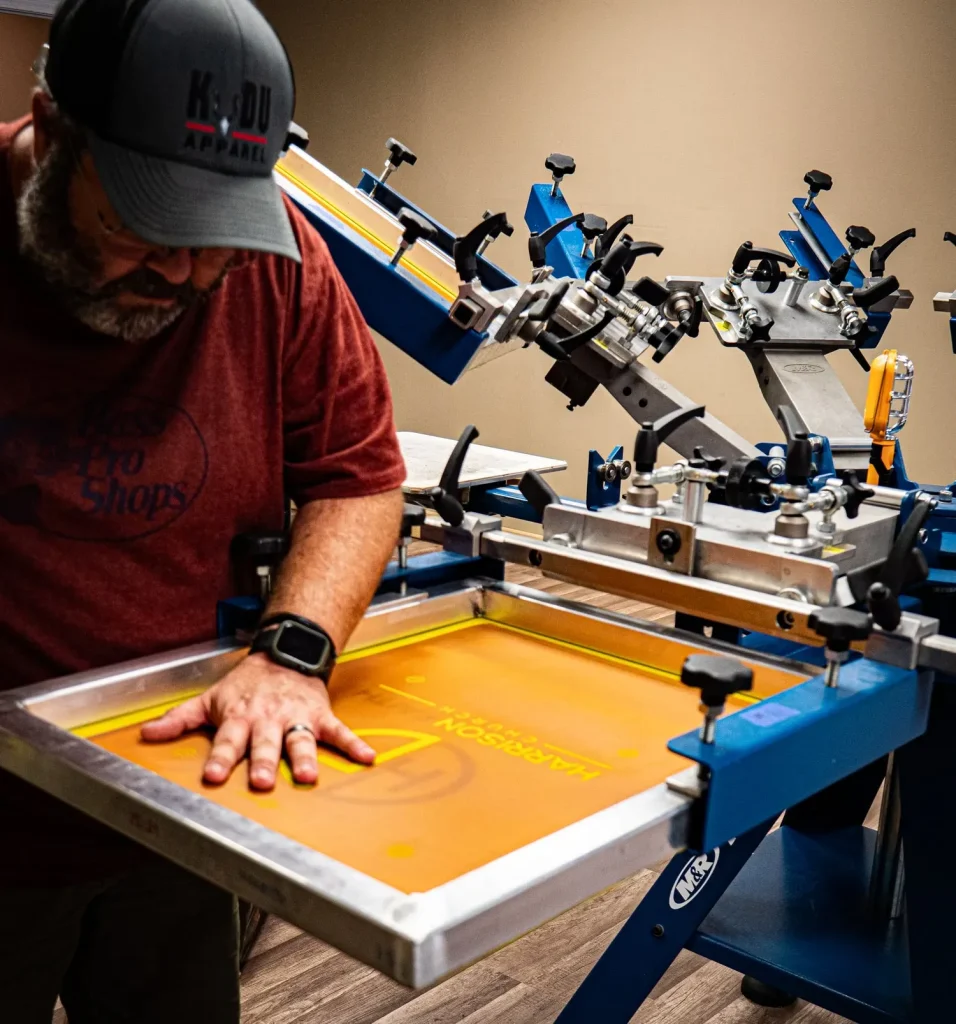
Foundations of Screen Printing Design: Key Screen Printing Design Steps
Getting from idea to ink begins with a clear brief and a practical map of how each element will print. When you frame the project around the screen printing design steps, you can anticipate constraints such as ink count, garment color, and fabric stretch. This upfront planning helps you choose appropriate vector elements, safe margins, and a scalable composition that remains legible at target print sizes.
Organize the work into a design-to-print workflow that moves from concept sketches to vector artwork, color selection, and layer organization. Early decisions about ink systems (plastisol, water-based, discharge) and underbase requirements influence both the visual outcome and the efficiency of production. This approach minimizes rework and aligns creative intent with printer capabilities.
Custom Screen Printing Design: From Concept to Print-Ready Artwork for Apparel
Translating a concept into print-ready artwork for apparel means moving from moodboard to scalable vector shapes. Use Illustrator to create clean, closed shapes and consistent stroke weights, ensuring the art can be separated into distinct color layers later. Consider how the design will perform on light, dark, and colored fabrics and plan the underbase needs accordingly.
With a clearly defined concept, deliver layered files that show each ink as a separate color group and provide proofing for color separation for screen printing. A disciplined prepress for screen printing plan helps protect fidelity during production, and a well-prepared color palette keeps the design aligned with the brand while reducing color management complexity.
Color Separation for Screen Printing: Techniques for Bold, Reproducible Colors
Color separation for screen printing is the heart of the process. By organizing art into logical color blocks and solid shapes, you create crisp prints that read well on both light and dark garments. Plan separations with the ink system and fabric in mind to minimize halftone noise and misregistration.
Explore approaches such as spot color separations for logos and CMYK-like simulations for photographic elements. A hybrid strategy—core spot colors with restrained halftones—often yields the cleanest results while keeping production efficient. Remember to sequence underbase and flash cure steps to maintain print clarity across layers.
Prepress for Screen Printing: The Critical Bridge Between Design and Production
Prepress for screen printing is the technical bridge that transforms artwork into printable files. It focuses on outlining text, cleaning edges, and organizing color channels so each ink layer can be produced reliably. A meticulous prepress routine reduces misregistration, ink bleed, and color drift during a run.
Key tasks include establishing consistent color channels, adding bleed, and setting trapping between adjacent colors. Ensure the final file is viewable at print size and tested across garment colors. A robust prepress process also includes version control and documentation to speed reprints and revisions.
From Art to Print: Building a Robust Design to Print Workflow for Apparel
A strong design to print workflow starts with properly prepared export formats and version history. Save in AI, EPS, and high-resolution raster formats, and generate a color-separated proof so printers can validate ink layers before production. Documenting garment color, ink types, and coverage ensures consistency across runs.
Coordinate proofs, color management, and production notes to align expectations with the shop. This workflow should integrate underbase planning, flash times, and final cure steps so the artwork translates faithfully from concept to finished apparel.
Proofing, Testing, and Quality Assurance: The Final Checks Before Production
Proofing validates how the design will print in real life. Digital proofs are quick for sign-off, but physical test prints on the actual garment are essential for confirming color accuracy and registration. Use these proofs to catch issues that screen previews miss.
During testing, check ink stacking, ghosting, and color drift across fabrics. Document findings, adjust trapping, pigment density, and layer order, and re-prove as needed. This disciplined QA reduces reprints and helps ensure the final product matches the design intent.
Frequently Asked Questions
What are the essential steps in the screen printing design steps for a custom screen printing design?
The screen printing design steps for a custom screen printing design begin with a clear concept and audience, then convert that idea into scalable vector artwork. Lock a color palette early and plan color separation, while designing with print constraints in mind (bold shapes, legible scale). Prepare the artwork for prepress by outlining text and organizing colors on dedicated layers, and generate proofs or test prints to validate scale and placement before delivering print-ready artwork for apparel.
Why is prepress for screen printing crucial for turning a concept into print-ready artwork for apparel?
Prepress for screen printing is the bridge from concept to production. It cleans edges, outlines text, and ensures each color sits on its own layer with proper overprint settings and trapping. A thorough prepress process reduces misregistration, ink bleed, and color drift, helping you produce true print-ready artwork for apparel that matches the design intent.
How does color separation for screen printing affect the final look of a custom screen printing design?
Color separation for screen printing determines how the artwork translates to ink layers. A limited, well-planned palette with spot colors for core elements or simulated process separations keeps the print efficient and sharp. Thoughtful underbase planning and appropriate halftones prevent muddy edges on dark fabrics, preserving the design’s impact in a true custom screen printing design.
What does the design to print workflow look like for apparel—from concept to vector?
The design to print workflow for apparel starts with a concept sketched or moodboard-driven, then moves to scalable vector artwork. Lock the color palette, assign each ink to its own layer, and prepare for prepress with clean outlines and organized layers. Export print-ready formats and review proofs to ensure the final artwork aligns with the original concept and print constraints.
What file formats and export settings best support print-ready artwork for apparel in screen printing?
Use AI, EPS, or PDF for vector artwork and high-resolution TIFFs for raster elements, keeping a layered, editable source when possible. Provide a color-separated file set and a composite proof, and include bleed and safe margins. Convert text to outlines and document print specs (garment color, ink system, approximate coverage) to ensure print-ready artwork for apparel remains consistent in screen printing.
How should proofs and test prints be used in the design-to-print workflow to ensure quality?
Proofs and test prints are essential in the design-to-print workflow. Start with digital proofs for quick validation, then produce physical tests on the actual garment or a close substitute. Use feedback to adjust color, placement, underbase needs, and trapping, and obtain client sign-off before full production to guarantee a high-quality custom screen printing design.
| Topic | Key Points |
|---|---|
| Concept & Prepress Planning | – Standout design begins with a clear concept and a plan for translating artwork through the screen printing process. – A disciplined prepress workflow bridges design and print, reducing rework. |
| Design Mindset & Audience | – Define the audience and garment early; adapt color and separation for athletic wear, performance fabrics, or dark tees. – Plan for constraints such as stretch, wash durability, and underbase where appropriate. – This upfront planning underpins a smooth design-to-print workflow. |
| Concept to Vector | – Start as a concept sketch or moodboard; translate to scalable vector artwork when possible. – Vector art provides clean edges, predictable scaling, and easier color separation. – If using raster, ensure high resolution (300 DPI) and plan for vectorization where feasible. |
| Color Strategy & Separation | – Color separation is central; use a limited palette to reduce screens. – Approaches include spot color separation and CMYK-like or simulated process; hybrid methods are common. – Plan underbase and flash cure steps to ensure on-dark readability. |
| Prepress for Production | – Clean edges, outline text, and place elements on correct layers with appropriate opacity/overprint. – Practical steps: outlines, remove stray points, maintain consistent color channels, establish trapping, verify at print size, add bleed. |
| File Formats & Export | – Use AI, EPS, PDF, or high-res TIFFs for raster elements. – Keep version history; provide a print-ready version and a separate editable file. – Include color-separated proofs and clear print specifications. |
| Proofs & Test Prints | – Proofs (physical or digital) help verify color, registration, and feel. – Test prints catch issues like ink stacking or misalignment before mass production. – Digital proofs are useful, but test on actual garments is best. |
| Practical Tips | – Plan for the lowest ink count that preserves impact; fewer colors reduce cost/complexity. – Favor bold shapes and high-contrast color pairs. – Keep layers organized; test on multiple garment colors; communicate with printers; respect fabric stretch; document decisions. |
| Common Pitfalls | – Overly intricate line work can vanish in halftones; small text can become illegible. – Failing to account for underbase on dark fabrics often weakens color. – Prioritize bold shapes and robust prepress planning to reduce reprints. |
Summary
The essence of design, and especially custom screen printing design, begins with a thoughtful concept and a plan that translates well to fabric. A robust process couples creative intent with practical prepress steps, ensuring color strategy, vector readiness, and reliable production across garments. By documenting decisions, testing thoroughly, and collaborating with printers, this approach yields consistent, high-quality results in every run.