
DTF Artwork Tips unlock practical guidance for creating sharp, vibrant Direct-to-Film prints that endure on fabrics. This introductory guide blends design insight with a focus on the Direct-to-Film transfer process to help designers and print operators alike, from concept through proofing and approvals across diverse teams for final sign-off. Mastering DTF color management and careful artwork preparation ensures colors stay vivid from screen to fabric, across lighting and fabric mixes. By outlining clear guidelines and practical tips, you’ll minimize halos, misregistrations, and color drift across a range of garments, from tees to jackets, and across different product lines and applications. From high-resolution files to smart palette choices, these tips support reliable results on multiple fabrics.
Viewed through an LS-informed lens, the Direct-to-Film transfer approach—often described as a film-to-fabric transfer system—blends digital artwork with a printable intermediary that transfers to textiles. Also described as a film-based transfer, this workflow sits between on-screen design and garment production, enabling smoother proofs and faster approvals across QC stages. Using terms like DTF process and film-to-fabric workflow helps designers align expectations across fabrics and color spaces. DTF design tips provide practical guidance for typography, gradients, and spacing, ensuring clearer communication and more consistent results.
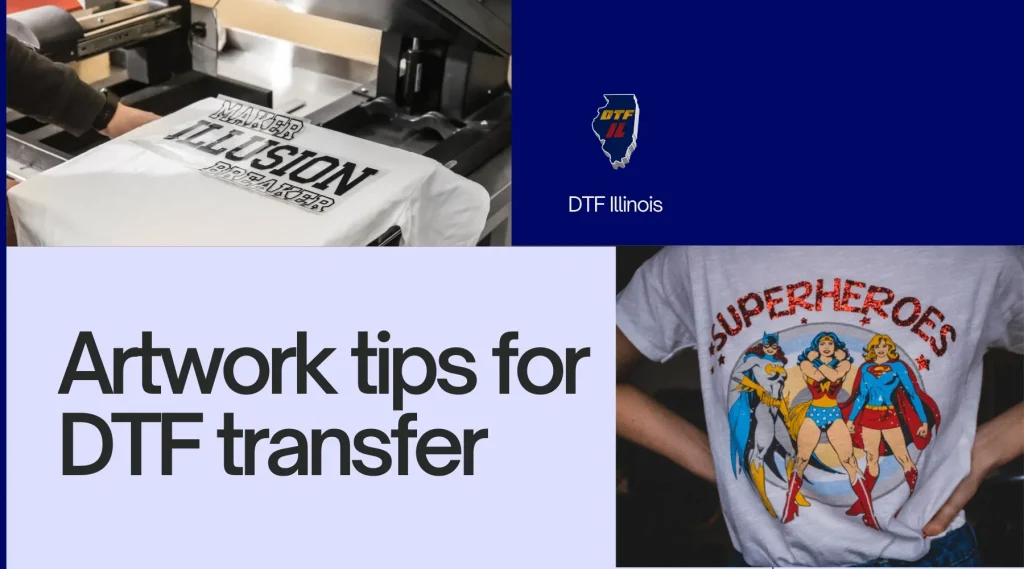
DTF Artwork Tips: Sharpen Color Fidelity from Screen to Direct-to-Film
DTF Artwork Tips begin with aligning your digital artwork with the Direct-to-Film transfer workflow. When you design for Direct-to-Film prints, color and detail must survive two transformations: the film print and the fabric transfer. Emphasize clean edges, predictable color, and robust layering to preserve fidelity from screen to fabric.
Use vector or high-resolution raster art, plan for line integrity, color separation, and printability. Your DTF color management workflow and Direct-to-Film transfer considerations will help maintain the vibrancy and detail you designed, ensuring Direct-to-Film prints stay true on fabric.
Resolution, File Formats, and Edge Definition for Direct-to-Film Prints
Work at a high resolution; 300 PPI baseline. For raster artwork, ensure sharp lines and prepare a vector version for scaling. Export in lossless formats such as TIFF or PNG with a transparent background to avoid artifacts that can blur edges on Direct-to-Film prints.
Test prints are invaluable because gradients and fine textures can behave differently during Direct-to-Film transfer. Maintain vector versions for scaling, and plan your file formats with DTF design tips in mind to safeguard edge definition on film and fabric.
DTF Color Management: Calibrated Workflows for Consistent Direct-to-Film Prints
DTF color management is a cornerstone of predictable output. Calibrate your monitor, use consistent color profiles, and embed ICC profiles in your artwork. When colors drift between screen and print, gaps in gamma, white point, or printer profiles are usually to blame.
Create a controlled workflow: design in a color-managed space, soft-proof with the printer’s profile, and print a calibrated test sheet before large runs. A thoughtful DTF color management approach helps Direct-to-Film prints stay vibrant while staying within the printer’s gamut.
Palette Architecture and Gradients for Bold DTF Design Tips
A vibrant Direct-to-Film print benefits from a printer-friendly palette. Avoid over-reliance on pure RGB values that fall outside the printer’s capabilities, and test color separations for gradients and transitions. These DTF design tips help you predict how colors will land on film.
Use slightly broader color steps and solid fills where possible to improve stability in the transfer. Plan gradient renders with separations to minimize banding on Direct-to-Film prints and ensure consistent color relationships across fabrics.
Preparing Artwork for Transparency, Texture, and Detail in DTF Transfers
DTF supports transparency, but prepare artwork so transparency remains visible after transfer. Separate layers clearly for the print operator and label them for easy interpretation. Account for potential edge halos around fine lines; a small overlap or contour can prevent gaps after transfer.
When layering textures, keep high-contrast areas well defined to preserve depth in the final Direct-to-Film print. Clear labeling and deliberate layer management reduce miscommunication during the Direct-to-Film transfer process.
Text, Typography, and Small Features: Keeping Type Legible on Direct-to-Film
Small type can disappear or blur in the transfer if not prepared properly. Use bold, legible font choices for small text, and consider outlining text to preserve crispness. If your design includes tight letter spacing, test at 100% size to ensure legibility after the transfer.
These DTF design tips help ensure that typography remains readable on all fabric colors. Pay attention to kerning, tracking, and color contrast, and run typography-focused tests to confirm readability on Direct-to-Film prints.
Frequently Asked Questions
According to DTF Artwork Tips, what are the core steps to achieve sharp Direct-to-Film prints?
DTF Artwork Tips recommend starting with vector or high-resolution raster art to preserve line integrity and clean edges, with robust layering for the two-stage print path (digital file to film, then film to fabric). Plan color separations early and design for printability to ensure the design translates faithfully after transfer. Export at high resolution (300 PPI) in lossless formats and run test prints to verify sharp Direct-to-Film prints.
How does DTF color management affect the outcome of Direct-to-Film transfer?
DTF color management requires calibrating your monitor, embedding ICC profiles, and soft-proofing with the printer profile. Build a controlled workflow and test sheet to reduce screen-to-print drift, ensuring the vibrancy stays within the printer’s gamut for Direct-to-Film transfer.
In DTF Artwork Tips, what resolution and formats ensure sharp lines for Direct-to-Film prints?
Use 300 PPI at the final print size and provide a vector version for scaling. Export in lossless formats such as TIFF or PNG with transparency when needed, and avoid compressed formats that degrade edge sharpness for Direct-to-Film prints.
What role do palettes and gradients play in DTF design tips for vibrant Direct-to-Film prints?
Choose printer-friendly palettes, convert colors to the printer’s gamut, and test color separations for gradients. Avoid relying too heavily on pure RGB values and use slightly broader color steps to improve stability during Direct-to-Film prints.
How should I prepare artwork for transparency and detail in DTF Artwork Tips to ensure clean transfers?
Separate layers clearly and label them for the print operator, account for potential edge halos around fine lines, and where appropriate use slight overlaps. Maintain high-contrast areas to preserve depth after the Direct-to-Film transfer.
What is the recommended file-to-film-to-fabric workflow in DTF Artwork Tips to minimize issues?
Prepare film artwork with safe margins and alignment marks, ensure correct orientation and ink density during film printing, and verify color response and alignment after transfer. Following a disciplined file-to-film-to-fabric workflow reduces surprises in Direct-to-Film prints.
| Section | Key Points | Practical Tips |
|---|---|---|
| Introduction | DTF printing blends digital design with heat-transfer finishes to decorate garments; it enables vibrant, durable results on many fabrics; mastering artwork for DTF is essential for sharp, color-rich prints from screen to fabric. | Focus on color control and detail retention from screen to fabric. |
| Design with intent | Artwork undergoes a two-stage journey: digital file to printed film, then film to fabric; color handling, resolution, and halftone behavior affect the final look. | Start with vector or high-resolution art; plan for clean edges, predictable color, and robust layering to reproduce on many garments. |
| Resolution, file formats, and sharp lines | High resolution is essential; 300 PPI baseline; consider vector versions for text; export in lossless formats (TIFF or PNG with transparent background); test prints to manage gradients and edge sharpness. | Use 300 PPI; save as TIFF/PNG; perform test prints; consider vector rasterization at final size. |
| Color management and ICC profiles | Calibrate monitor; embed ICC profiles; soft-proof with printer profile; print calibrated test sheet; manage colors to stay within printer gamut. | Maintain a color-managed workflow; soft-proof; calibrate printer before production. |
| Palette choices and gradients | Rely on printer-friendly palettes; avoid RGB values outside gamut; test color separations for gradients; use broader color steps and solid fills for stability. | Convert to printer-friendly palette; test separations; favor broader steps and solid fills. |
| Preparing artwork for transparency, texture, and detail | DTF supports transparency but preserve it through transfer; separate layers clearly and label for operator; watch for edge halos and overlaps; keep high-contrast areas defined. | Separate layers; label clearly; allow slight overlap if needed to prevent gaps. |
| Handling text and small features | Small type can blur; use bold, legible fonts; outline text to preserve crispness; test at 100% size for legibility after transfer. | Choose bold fonts; outline text; test 100% size. |
| Color consistency across fabrics and batches | Fabric variance can shift color; create a color-consistency test panel across fabrics and batches; compare results and adjust as needed. | Print across multiple fabrics; adjust colors as needed. |
| The printing workflow: from file to film to fabric | A smooth workflow reduces surprises: safe margins, alignment marks, correct orientation; verify ink density on film; check fabric response and alignment after transfer. | Include margins/marks; verify orientation; run test prints. |
| Troubleshooting common issues in DTF prints | Expect color shifts, ghosting, and misregistration; use calibrated press; ensure film quality and adhesive consistency; re-check color separations and margins; implement robust testing protocols. | Calibrate press; run tests; verify separations and margins. |
| Maintenance, environment, and long-term consistency | Stable environment and regular maintenance support lasting quality; clean media, dust-free equipment, organized archives with color profiles and print settings; document SOPs for color management. | Maintain equipment; archive with color profiles; document SOPs. |
Summary
Conclusion: