
DIY DTF printing has exploded in popularity for makers and small businesses alike, thanks to its accessibility, affordability, and vibrant, long-lasting results. If you’ve ever wondered how to create custom apparel, tote bags, or other textiles with high-quality prints at home, this guide covers the must-have tools you’ll need to start a successful journey. The core toolkit centers on a reliable DTF printer paired with DTF transfer film to ensure crisp, durable transfers across a wide range of fabrics. Keeping powders, curing steps, and post-transfer care simple and repeatable will save you time and money as you scale from hobby projects to small launches, while maintaining a clean, dust-free workspace and documenting settings for different fabrics. With a thoughtful workflow and dependable equipment, you can produce vibrant, durable designs at home while exploring new product ideas and potential revenue streams.
From a different angle, this process can be described as direct-to-film transfers, a film-based approach that moves digital artwork onto fabrics through an adhesive powder and heat activation. In practice, you design in software, print onto a specialized sheet, apply powder, cure, and press onto textiles to achieve bright colors and smooth finishes, with budgeting, sourcing reliable materials, and avoiding common rookie mistakes. A home setup can be affordable and scalable, using a reliable printer, transfer film, and a controlled heat source to produce custom apparel, bags, and home textiles. As you experiment, you’ll value color management, material compatibility, and workflow stability to deliver consistent results across batches.
Getting Started with DIY DTF Printing: Core Supplies, Setup, and Workflow
DIY DTF printing makes studio-quality transfers accessible for makers and small businesses. Starting with a solid foundation in DTF supplies, you’ll combine DTF transfer film, the right DTF inks, a compatible DTF printer, and a reliable heat press to unlock vibrant, durable designs at home.
Design a repeatable workflow from the start: plan your color profiles, select a compatible DTF printer, ensure you have consistent DTF inks and adhesive powder, and map a clean process from design to final transfer using the heat press. With a thoughtful setup, you’ll minimize waste and maximize consistency across prints.
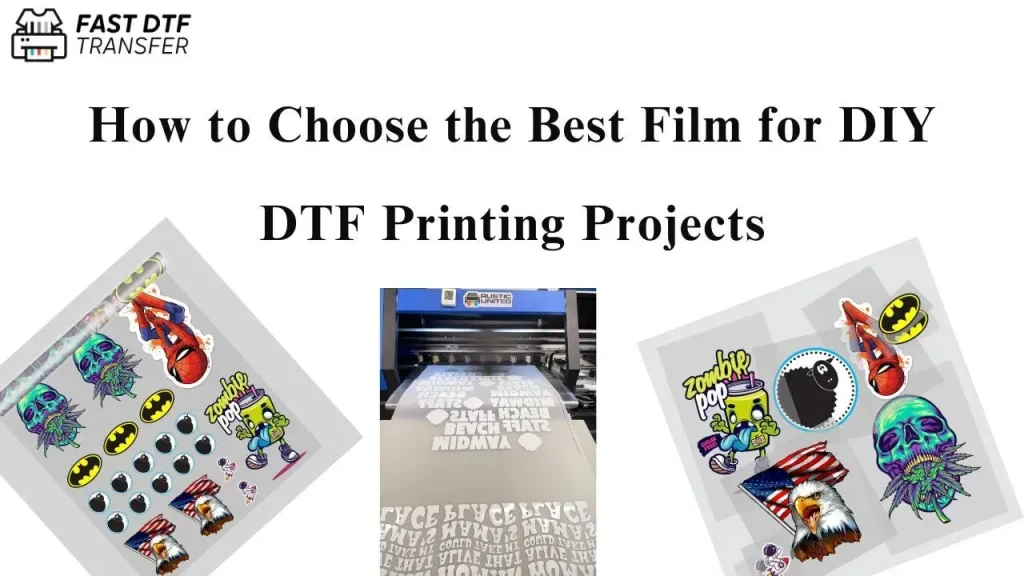
DTF Transfer Film and Inks: How to Choose for Vibrant, Durable Prints
The transfer film and inks are the heart of the image quality. When evaluating DTF transfer film, look for release properties, surface texture, and stability that minimize ghosting and powder wastage. Pair that with high-saturation DTF inks for bold color on cotton, blends, and polyesters.
Consider compatibility with your fabric mix and your printer workflow. The combination of film quality and pigment ink formulation determines not only color accuracy but also wash-fastness and transfer durability. Prioritize films that work well with your powder adhesive and curing method.
Choosing a DTF Printer and Supporting Gear for Home Production
Your DTF printer choice sets the baseline for color, cost, and reliability. A true DTF printer is designed to print onto transfer film with the correct pigments and curing-ready coatings. If you start with a standard pigment printer, you’ll need a careful workflow and coatings, but dedicated DTF printers provide smoother, repeatable results.
Alongside the printer, assemble reliable supporting gear: a consistent powder adhesive supply, a powder shaker or sifter, and a heat press with even heat distribution. This kit ensures reliable transfers across fabrics and sizes.
Powder, Cure, and Transfer: Building a Reliable DTF Workflow
A solid DTF workflow starts with correct powdering. Apply uniform adhesive powder to the printed film and shake off excess to prevent clumps and hot spots. A clean, dust-free environment helps you achieve even curing and clean transfers.
Curing and transfer require precise temperature, time, and pressure. Use a heat press or dedicated dryer to cure the powder, then transfer the image to fabric with calibrated settings. Peel the film when cool for the best adhesion and color integrity.
Color Management and Quality Control in DTF Printing
Quality starts before you print. Implement color management across your RIP, printer, and monitor to reproduce vibrant palettes and gradients accurately. Use calibration tools and test strips to align profiles and minimize banding.
Develop a repeatable QC routine: run small test prints, verify color density, and adjust print speed or DPI for different fabrics. Consistent settings across batches ensure reliable color, wash-fastness, and transfer durability.
Maintenance, Troubleshooting, and Budget Planning for DIY DTF
Maintaining your DTF setup saves money and time. Regularly clean the print path, check nozzles, and store films and powders in dry conditions to extend life. Common issues like ghosting, poor adhesion, or color shifts are easier to diagnose when you document settings and workflows.
Plan your budget around core gear first—DTF printer compatibility, transfer film and powders, and a sturdy heat press—and then scale with RIP software and color-management tools as needed. Ongoing costs include powders, inks, films, and occasional consumables to sustain production.
Frequently Asked Questions
What is DIY DTF printing and why is it a good option for small runs?
DIY DTF printing is the process of printing designs onto DTF transfer film with a DTF printer, applying adhesive powder, curing, and transferring the image to fabric using a heat press. It delivers vivid colors on many fabrics and offers lower upfront costs and simpler workflows for hobbyists and small businesses.
What DTF supplies do I need to start with DIY DTF printing?
Core DTF supplies include DTF transfer film, DTF inks, a DTF printer or compatible setup, DTF powder adhesive, a powder shaker, and a reliable heat press. For workflow efficiency, add spatulas, squeegees, lint-free cloths, cleaning supplies, and consider optional tools like RIP software and calibration aids.
How do I set up a DIY DTF printing workflow from design to transfer?
Follow these steps: 1) design and prepare artwork with printer profiles; 2) print with proper media settings; 3) apply and distribute DTF powder adhesive evenly; 4) cure/dry the powder; 5) transfer with a heat press at the recommended temperature, time, and pressure; 6) finish and inspect results for adhesion and color.
What are common issues in DIY DTF printing and how can I fix them?
Common problems include ghosting or blurry details (check transfer film quality, powder coverage, and heat press settings), poor adhesion (verify powder curing and preheat), color inconsistencies (recalibrate color profiles), and powder clumping (keep powders dry and sift evenly). Always run test prints first.
What maintenance helps my DIY DTF printing setup last longer?
Regular maintenance includes cleaning the print path and checking nozzles, storing films away from humidity, ensuring the heat press platen is flat and provides even pressure, and replacing consumables (inks, powders, films) as they wear. Routine calibration and color management also extend consistency.
How should I budget for a DIY DTF printing project and estimate ongoing costs for DTF supplies?
Start with core gear: a reliable heat press, compatible transfer film and powder, and a capable printer. Add RIP software and color management as you scale. Ongoing costs include inks, powders, and films, plus occasional upgrades to maintain quality and throughput.
| Aspect | Key Points |
|---|---|
| Introduction to DIY DTF Printing | DIY DTF printing has exploded in popularity for makers and small businesses due to its accessibility, affordability, and vibrant, long-lasting results. It enables creating custom apparel, tote bags, and textiles at home, serving as an entry point to a successful DTF workflow. |
| What is DIY DTF Printing and Why It Matters | Direct-to-film (DTF) printing transfers designs onto a special film, powders the film, cures the resin, and uses a heat press to transfer the image to fabric. Benefits include vibrant colors, broad fabric compatibility, and easier maintenance than some DTG methods; it’s attractive for small businesses, hobbyists, and crafters. |
| Core Supplies You’ll Need | DTF transfer film and PET film; DTF inks; DTF printer or compatible setup; DTF powder adhesive; Powder shaker or sifter; Heat press; Spatulas, squeegees, spreaders; Lint-free cloths, isopropyl alcohol, and cleaning supplies. |
| Optional but Valuable Tools and Accessories | RIP software or printer driver with color management; Design software (Illustrator, CorelDRAW, Inkscape); Bed/workstation mats and protective sheets; Heat-resistant gloves and a temperature-controlled workspace; Calibration tools (color cards, test prints). |
| Setting Up Your DIY DTF Printing Workflow | 1) Design and preparation: create/edit artwork with printer profile in mind; export to a print-ready format. 2) Printing: use proper media settings and verify alignment. 3) Powdering: apply adhesive powder evenly. 4) Curing and drying: cure powder evenly with suitable heat source. 5) Transfer: press transfer on fabric at recommended temps/times/pressures; peel when cool. 6) Finishing: check adhesion, wash-fastness, and color integrity; document tweaks for future prints. |
| Key Tips for Consistency and Quality | Color management matters: calibrate monitor, printer, and RIP; maintain consistent profiles. Fabrics matter: natural fibers yield vibrant results; blends can work with proper coating. Always run test prints. Be precise with temperature and time. Ensure even powder coverage. Regular maintenance saves money. |
| Common Challenges and How to Resolve Them | Ghosting or blurry details: high-quality film, proper powder coverage, and correct heat-press settings; consider higher-res mode or better film. Poor adhesion: ensure powder curing and adequate preheat; confirm adhesive compatibility. Inconsistent color/banding: recheck color calibration and alignment; standardize DPI/print settings. Powder clumping: keep powders dry and use a fine-mesh sifter. |
| Maintenance and Longevity of Your DTF System | Regularly clean the print path and check nozzles; use quality powders. Store films away from humidity. Periodically check heat press platen for flatness and even pressure. Replace consumables (inks, powders, films) as needed to maintain consistency. |
| Cost Considerations and Budgeting for DIY DTF Printing | Start with core gear (reliable heat press, appropriate film/powder, capable printer) and add RIP software/color management tools later as you scale. Budget ongoing consumables (powders, inks, films) into cost calculations. |
| Ethical and Practical Considerations | Work in a well-ventilated space; follow manufacturer guidelines for powders and adhesives. Respect design rights/licensing for resale. Consider sustainability: aim for eco-friendly inks/coatings and reuse/recycle backings where possible. |